But by creasing paper, one can create really wonderful shapes such as you may see in any book about origami.
It is less known that you can crease paper along curved lines, and so you can create paper sculptures and other objects built from curved surfaces without much gluing or taping with Scotch tape.
Activity
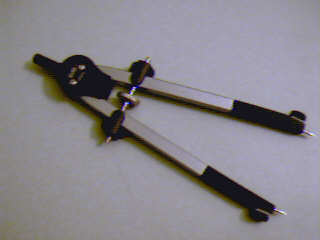 The tools are: Two compasses, one with a pencil, and the other with two points for scoring
around circles. (One good compass with exchangeable tips will
suffice.) A sharp pencil (with rather hard lead) and a ruler. Other
draftsman's tools are optional, and index cards are adequate tools for
drawing right angles.
The tools are: Two compasses, one with a pencil, and the other with two points for scoring
around circles. (One good compass with exchangeable tips will
suffice.) A sharp pencil (with rather hard lead) and a ruler. Other
draftsman's tools are optional, and index cards are adequate tools for
drawing right angles.
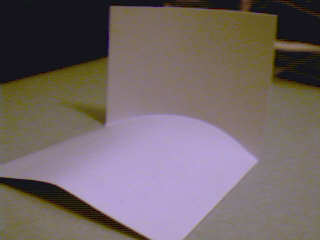
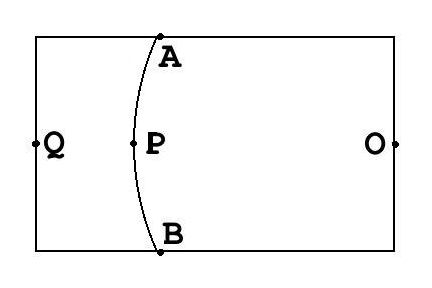 Take an index card. With a two-pointed compass, score a circular
line APB with center at O. Then gently start bending the card to
form a cylinder with axis parallel to OQ.
Take an index card. With a two-pointed compass, score a circular
line APB with center at O. Then gently start bending the card to
form a cylinder with axis parallel to OQ.
But make the right part OAPB convex, and the left part QAPB concave!
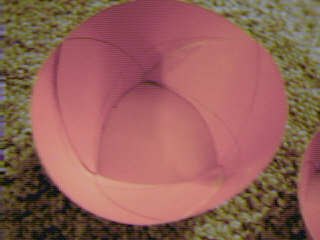
You will see the left side rising up. Keep forming the cylinder until segment QP is perpendicular to PO. It will look something like what is shown in the picture above.
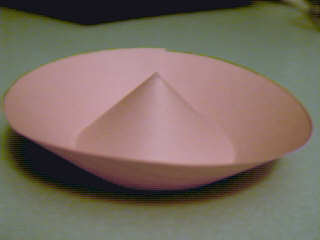
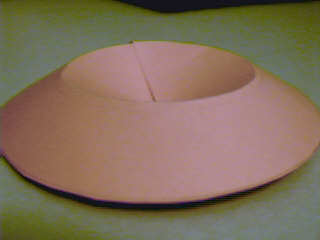
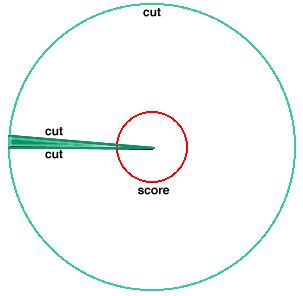
Task: Make a cone whose tip is an inverted cone that forms a crater.
Plan: Draw two concentric circles. Score the inner one, and cut out the outer one. Cut along one radius, or cut out and discard a narrow section. Bend it into a cone with an inverted tip. (This requires some practice.) Fasten it with glue or Scotch tape. Your volcano can be put upside down and double as a paper cup, a fancy hat, or even a UFO flying saucer.
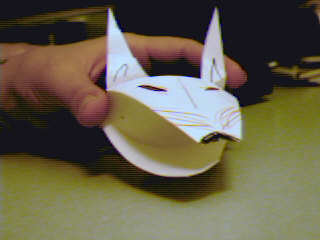
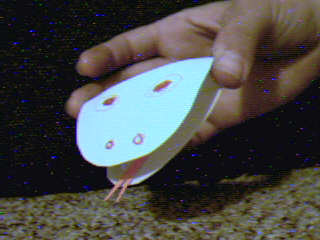
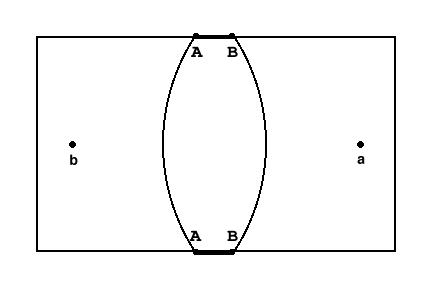
Task: Create a beak or snout by creasing along curves.
Plan: Trim an index card to narrower rectangle. You need really narrow one for a beak, but a broad one would make nice frog's mouth.
Score an arc AA, putting one point of your compass on a, and score an arc BB, putting one point of the compass on b. Shape the beak or snout, cutting along the dotted part of the border. On one side draw the eyes and the rest of the face. Fold, rounding both ends in the same direction. These parts will be the lower and upper jaws. The middle part will buckle in the opposite direction, forming the back of the head.
Hold your creation, keeping your thumb and forefinger on segments AB. When you squeeze your fingers lightly, the mouth will close.
You may attach ears by gluing them to the back of the head, and glue a tongue inside the mouth. If you make serrated cuts along the dotted line, the mouth will have teeth.
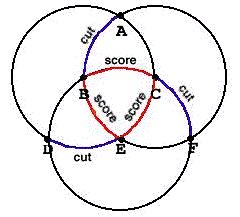
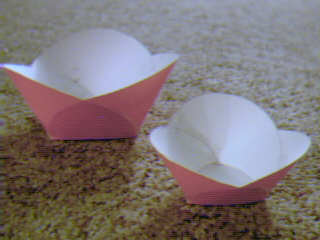
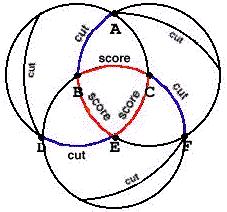
With a two-point compass, score arcs BC, CE, and EB. Cut out the whole shape, and cut the three arcs AB, DE, and FC. Fold the shape gently, so that A touches C, inside the container, D touches B, and F touches E.
The internal "triangle" will buckle up, the sides will curve and the long arcs AF, DF, and AD will form three "Mickey Mouse" ears. Fasten them with transparent tape inside and outside, and you have a nice container standing on three corners of its base.
 4.2: Flat-edged container In order to get a container with a
flat, round top, you have to trim off "Mickey's ears". So before
cutting out the shape, put the point of the compass at E, and with
radius EA, draw an arc beginning at A, trimming one ear. With the
point of the compass at C (and the same radius as before), draw an arc
beginning at D, trimming the second ear. With the compass point at A
(again with the same radius) draw an arc beginning at F. Cut out the
trimmed shape and proceed as before.
4.2: Flat-edged container In order to get a container with a
flat, round top, you have to trim off "Mickey's ears". So before
cutting out the shape, put the point of the compass at E, and with
radius EA, draw an arc beginning at A, trimming one ear. With the
point of the compass at C (and the same radius as before), draw an arc
beginning at D, trimming the second ear. With the compass point at A
(again with the same radius) draw an arc beginning at F. Cut out the
trimmed shape and proceed as before.
|
|
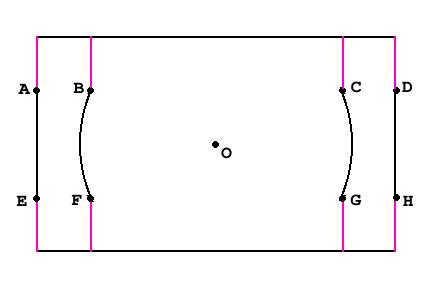
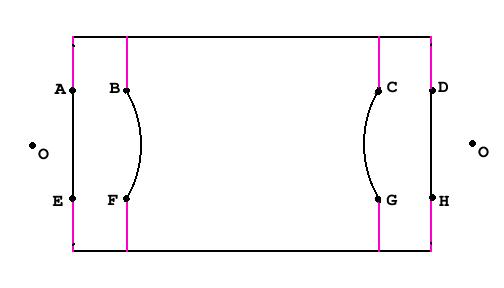
Cut all four short pink lines shown in the diagrams above. Score straight lines along AD and EH.
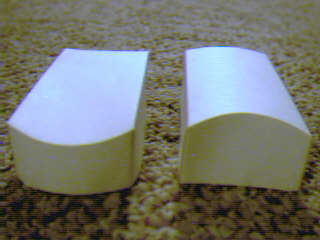
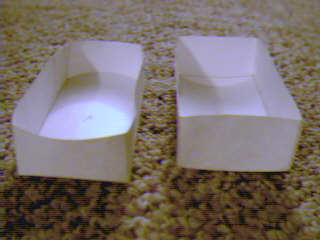
In a standing box (left in both pictures below), put one point of your two-point compass on o, and score two arcs, BF and CG.
In a rocking box (right in both pictures below), put one point of your compass on o, outside the card, and score an arc BF. Repeat this on the other end.
Fold each box, and tuck the square flaps inside. Fasten the flaps with tape or glue.
Bottom View |
Top View |
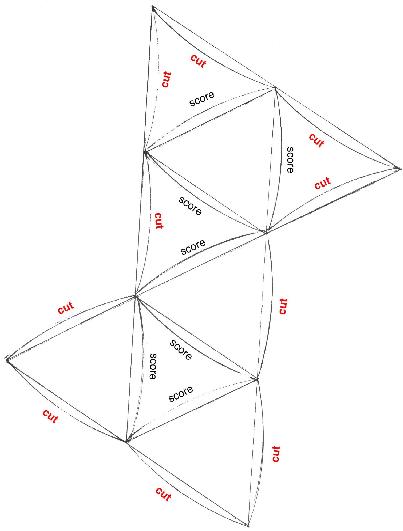
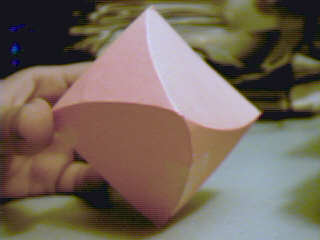
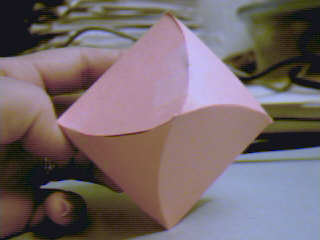
You can make an octahedron with curvy edges by using the pattern shown at the right. (We recommend you print out this image and then Xerox it onto card stock.)
We first made a grid of eight equilateral triangles, as shown. Then we drew arcs from circles on each edge of the grid. (The arcs are from a circle with a radius approximately twice as long as the edge length of a triangle in the grid.) You will need a two-pointed compass to score along the arcs on the interior of the grid. Then carefully cut out the pattern, crease along the curves, and tape it together!
You may experiment with different radii for the arcs. Smaller radii are harder to work with.