
Straw polyhedra and other nets
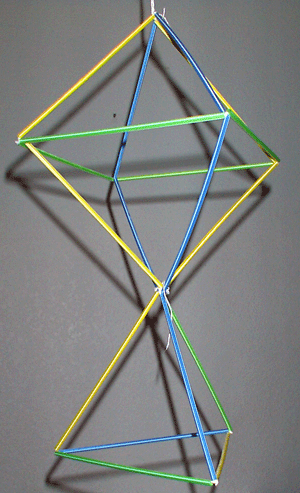
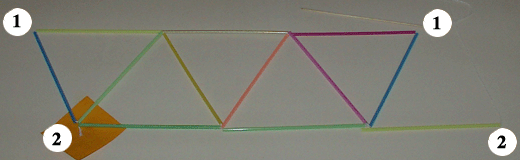
Straw polyhedra are skeletal polyhedra whose edges are non-bendable (8 inches long or less) colored straws, held together by thin cotton twine threaded through the straws. Straw polyhedra are very light and attractive looking, and they are a very valuable teaching help in the early and middle grades.
TOOLS
In order to make straw polyhedra you need:
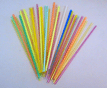
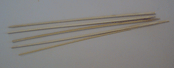
Colored non-bendable plastic straws.
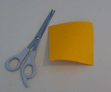
Thin cotton twine (plenty of it), and scissors to cut it.
A threading needle.
And a lot of "know how."
|
|
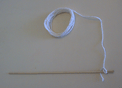
How to make and use a threading needle.
Get bamboo skewers 10 or 11 inches long. Cut off
their sharp points with nail-clippers or scissors. With a sharp knife make a
1/2 to 3/4 inch long cut along the grain at one end. Push a piece of twine (near
its end) across and into the slit you have just made. The bamboo is elastic
and will hold the twine quite well. Your needle is ready for threading. You
may use both ends of it, either pulling the twine through a straw or pushing
it through (in this case, the cut part of the bamboo needle leads the way).
After you finish, instead of pulling the twine out of the needle, cut it off,
leaving a small piece inside the slit. After you thread the needle the next
time, pull out this small piece. This makes threading much easier. You may thread
up to four strands of twine through one straw, but all polyhedra, or even more
complex nets, can be assembled by threading twine at most twice through the
same straw. And most of the time you have to thread twice, in order for your
construction to hold its shape well.
Displaying polyhedra.
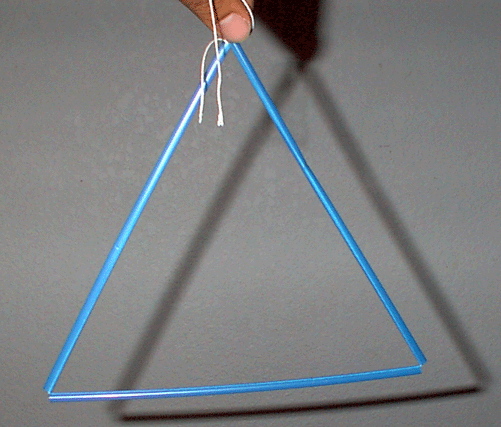
Stretch a string across the ceiling of the room. The straw polyhedra are so light that many of them can be hung from one string. Be sure that congruent polyhedra are not hung in the same position, with one string attached to one vertex. Hang some by attaching two strings to the ends of an edge or three strings to three corners of the same face, and so on. Planning the use of colors carefully not only adds to their attractiveness, but also makes assembly easier, and it is important when polyhedra are used as teaching aids.
Difficulties.
Threading is easy, but even small objects, such as tetrahedra, require a long piece of twine. Every polyhedron (or net) can be fixed together by one long strand of twine, and we do not know any reasonable design for which we would recommend more than three strands. But a long strand of twine gets twisted and tangled. So you have to constantly remember to untangle the "needle end" of the twine before threading it through the next straw. Also tie a small piece of paper or a small light object to the other end of the twine to prevent it from slipping into a straw. But the main difficulties are conceptual. Threading the twine to put a polyhedron together can be done in many different ways, but it is not arbitrary, so planning is important. But even if you make a good plan, what you see in front of you is a pile of straws, and you have to visualize the object you are making. This is very difficult for all children and for most adults. In order to overcome this difficulty, which can make the task impossible, you need teamwork.
Team work.
The best team sizes are 2, 3, and 4. With more than 4 people there are too many hands in the rather small (because of the length of the straws) working space. In every team only one person holds the needle and untangles the string. The others hold the straws, keeping enough straws in their correct positions so that visualizing the object becomes unnecessary. All team members take part in planning what to do next. Example. Two students making a tetrahedron. At each moment, three straws can lie on the table, forming a base. One student can hold two other straws that are also in their correct positions. So at no time is more than one edge missing from the final assembly. A very difficult task becomes easy.
Developing skills.
In order to assemble polyhedra with many faces, or other nets (polyhedra with some edges inside them), students have to build knowledge and skills in handling many situations, such as, "What to do when five edges meet at one vertex? In what order to thread them?" There are many ways of handling any such situation, but some are better than others. Learning which methods are better comes from practice and improved planning, and from evaluating the results.
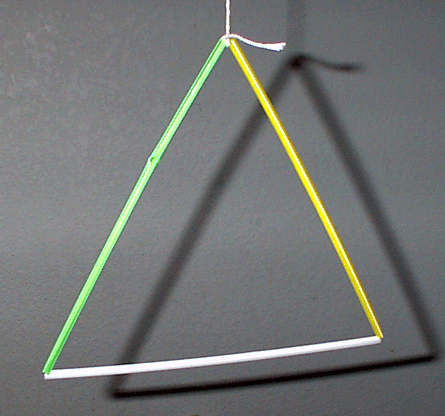
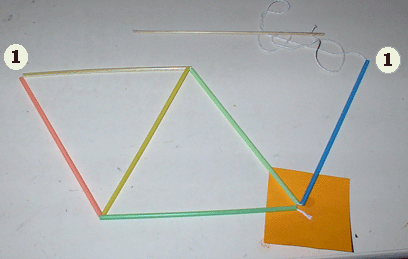
Making a triangle.
(This is a good candidate for the first object to make; it can be done in kindergarten and first grade.)
Task.
Make a triangle with three straws of different colors, threading it twice. Leave approximately one foot of a single strand outside for hanging it for display.
1. Compute the length of twine you need. Measure one straw, 8 inches. Two times passing three straws, 2*3*8 = 48 inches, 4 feet, plus 1 foot, 5 feet of twine.
2. Cut the twine and thread the needle. Using a ruler, or a yardstick, or a parts of your body (if you already know their length), measure and cut off 5 feet of twine. Gently untangle it, put a piece of it 1/2 inch from the end into the slit in the threading needle, and tie a crumpled piece of paper with a simple knot 1 - 2 inches from the other end.
3. Thread the twine. Put three straws on the table forming a triangle. Thread the twine counter clockwise (if you are right-handed), going twice around. Both ends of the thread will show in two straws at the same vertex. Untie the paper and remove the needle. Pull on both ends of the twine to tighten it. Tie a simple knot connecting the short end and the long and of the twine. The knot must hold the twine tight.
 |
 |
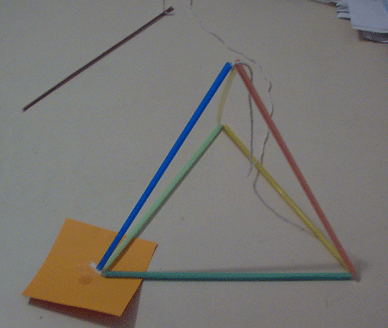
A second triangle.
Make a straw triangle with edges of three colors, A, B, C, which will hang with edge C at the top, and vith a vertex pointing down.
A solution.
Cut 5 feet of twine, and tie a piece of paper 8 inches from the end. Form a triangle on your desk, and thread in the following order: A B C A B. Tighten the twine, and tie the shorter end to the longer end of the string in a location which will make straw C horizontal.
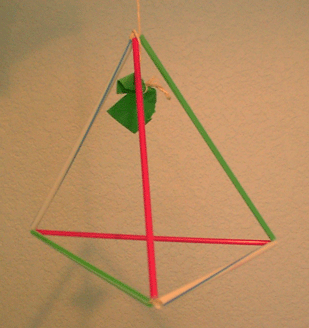
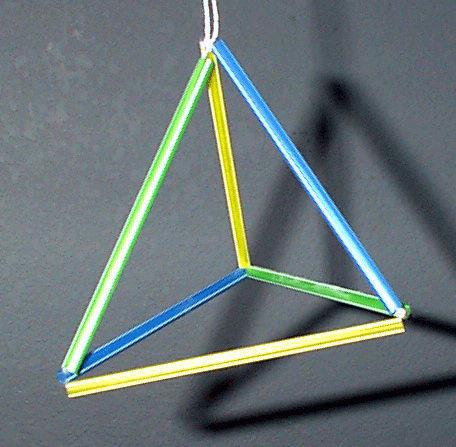
Straw tetrahedron
If the maximum number of edges that meet at one vertex of a net is k, and if you want to color the edges so that any two edges that meet have different colors, then you need at least k colors.
There is also a very useful theorem that says that in the situation described above, k+1 colors will always suffice.
When you make a straw polyhedron, making it with colored straws in such a way that in each vertex, all straws have different colors, is a big help. In such a case, describing how you thread the straws can be done simply by naming the next color!
A tetrahedron requires three colors, for example red R, green
G, and blue B. Put three straws B, G, and R on the table, forming the base of
your tetrahedron. See how the other three would fit above the base. To distinguish
between straws in the base and straws in the air of the same color, we
denoted
straws in the base by "r", "g", and "b". and straws
in the air by "R", "G", and "B". Start at the
top, in the air. Thread through,
R g r G R b r B G b g B tie the ends.

(There are many other ways to thread.)
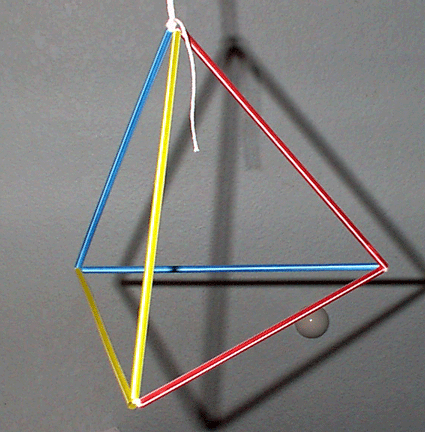
Make another tetrahedron using four colors and a different threading pattern.
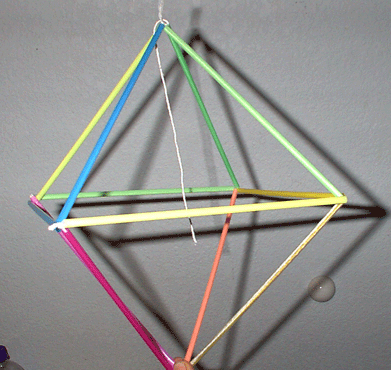
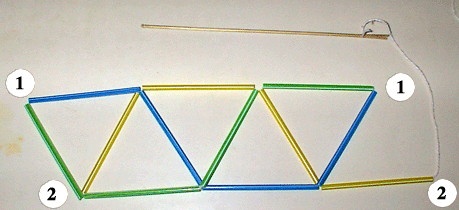
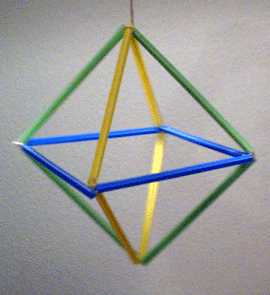
Straw octahedron
Draw an octahedron. Decide how to color its edges. It can be done with only 4 colors, but you may use 5 colors. Plan the threading and thread. (When you move across a thread, make only a simple loop around the first one.)
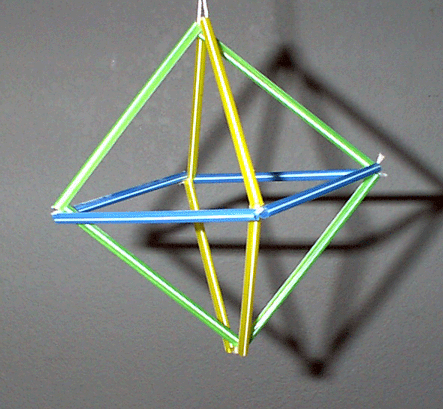
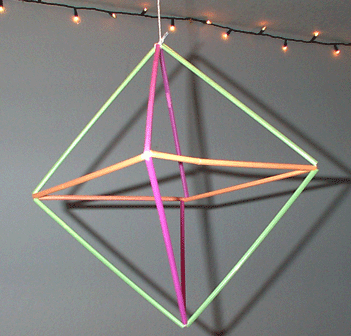
Design another octahedron consisting of three squares. Each square should be a different color! So this time your octahedron consists of only three colors.
Planning straw polyhedra.
When you draw polyhedra you use some projection. If you make the polyhedra from poster board, you draw a plan that includes drawing all their faces to be cut out. When you make a straw polyhedron, you may put straws on a table to form a pattern that shows what is connected to what. This helps very much as you plan your color pattern, and it helps you avoid mistakes in threading.
A pattern for a tetrahedron:
o---o  ?
\ / \ /
 o---o
Here, the lines represent straws, the o's represent vertices where the straws join, and a ? shows that this straw has to join another vertex (in this case, the top leftmost vertex).
A pattern for an octahedron:
 o---o---o---?
 \ / \ / \ /
  o---o---o---?
Again, the top ? corresponds to the top leftmost vertex, and the bottom ? corresponds to the bottom leftmost vertex.
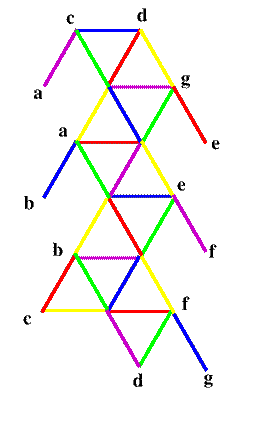
A pattern for an icosahedron (it is easier to draw it vertically):
Join the letters together |
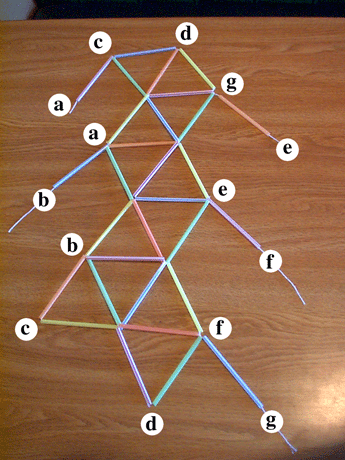 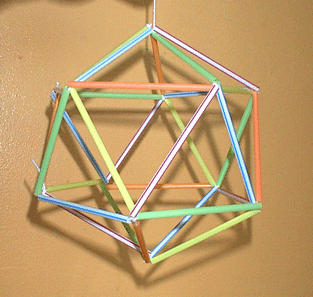 |
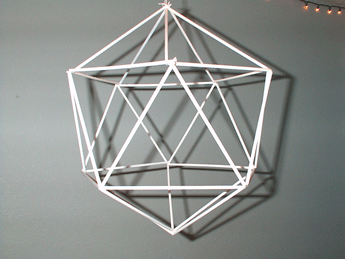
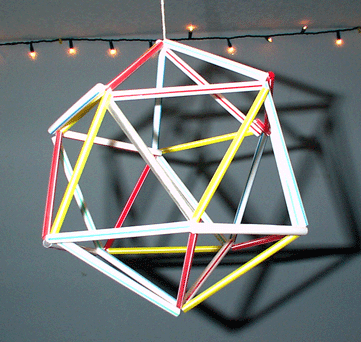
Other Finished Examples
You can thread this pattern (loosely along vertical lines) on a table, ending in the lowermost ?, and then tighten it and finish threading in space. For the last steps an extra pair of hands (or two pairs) are very helpful.
Can you design an icosahedron using five colors of straws, such that each of five colors meets at each vertex?
Click here to view images of a Teachers
Workshop for this lesson