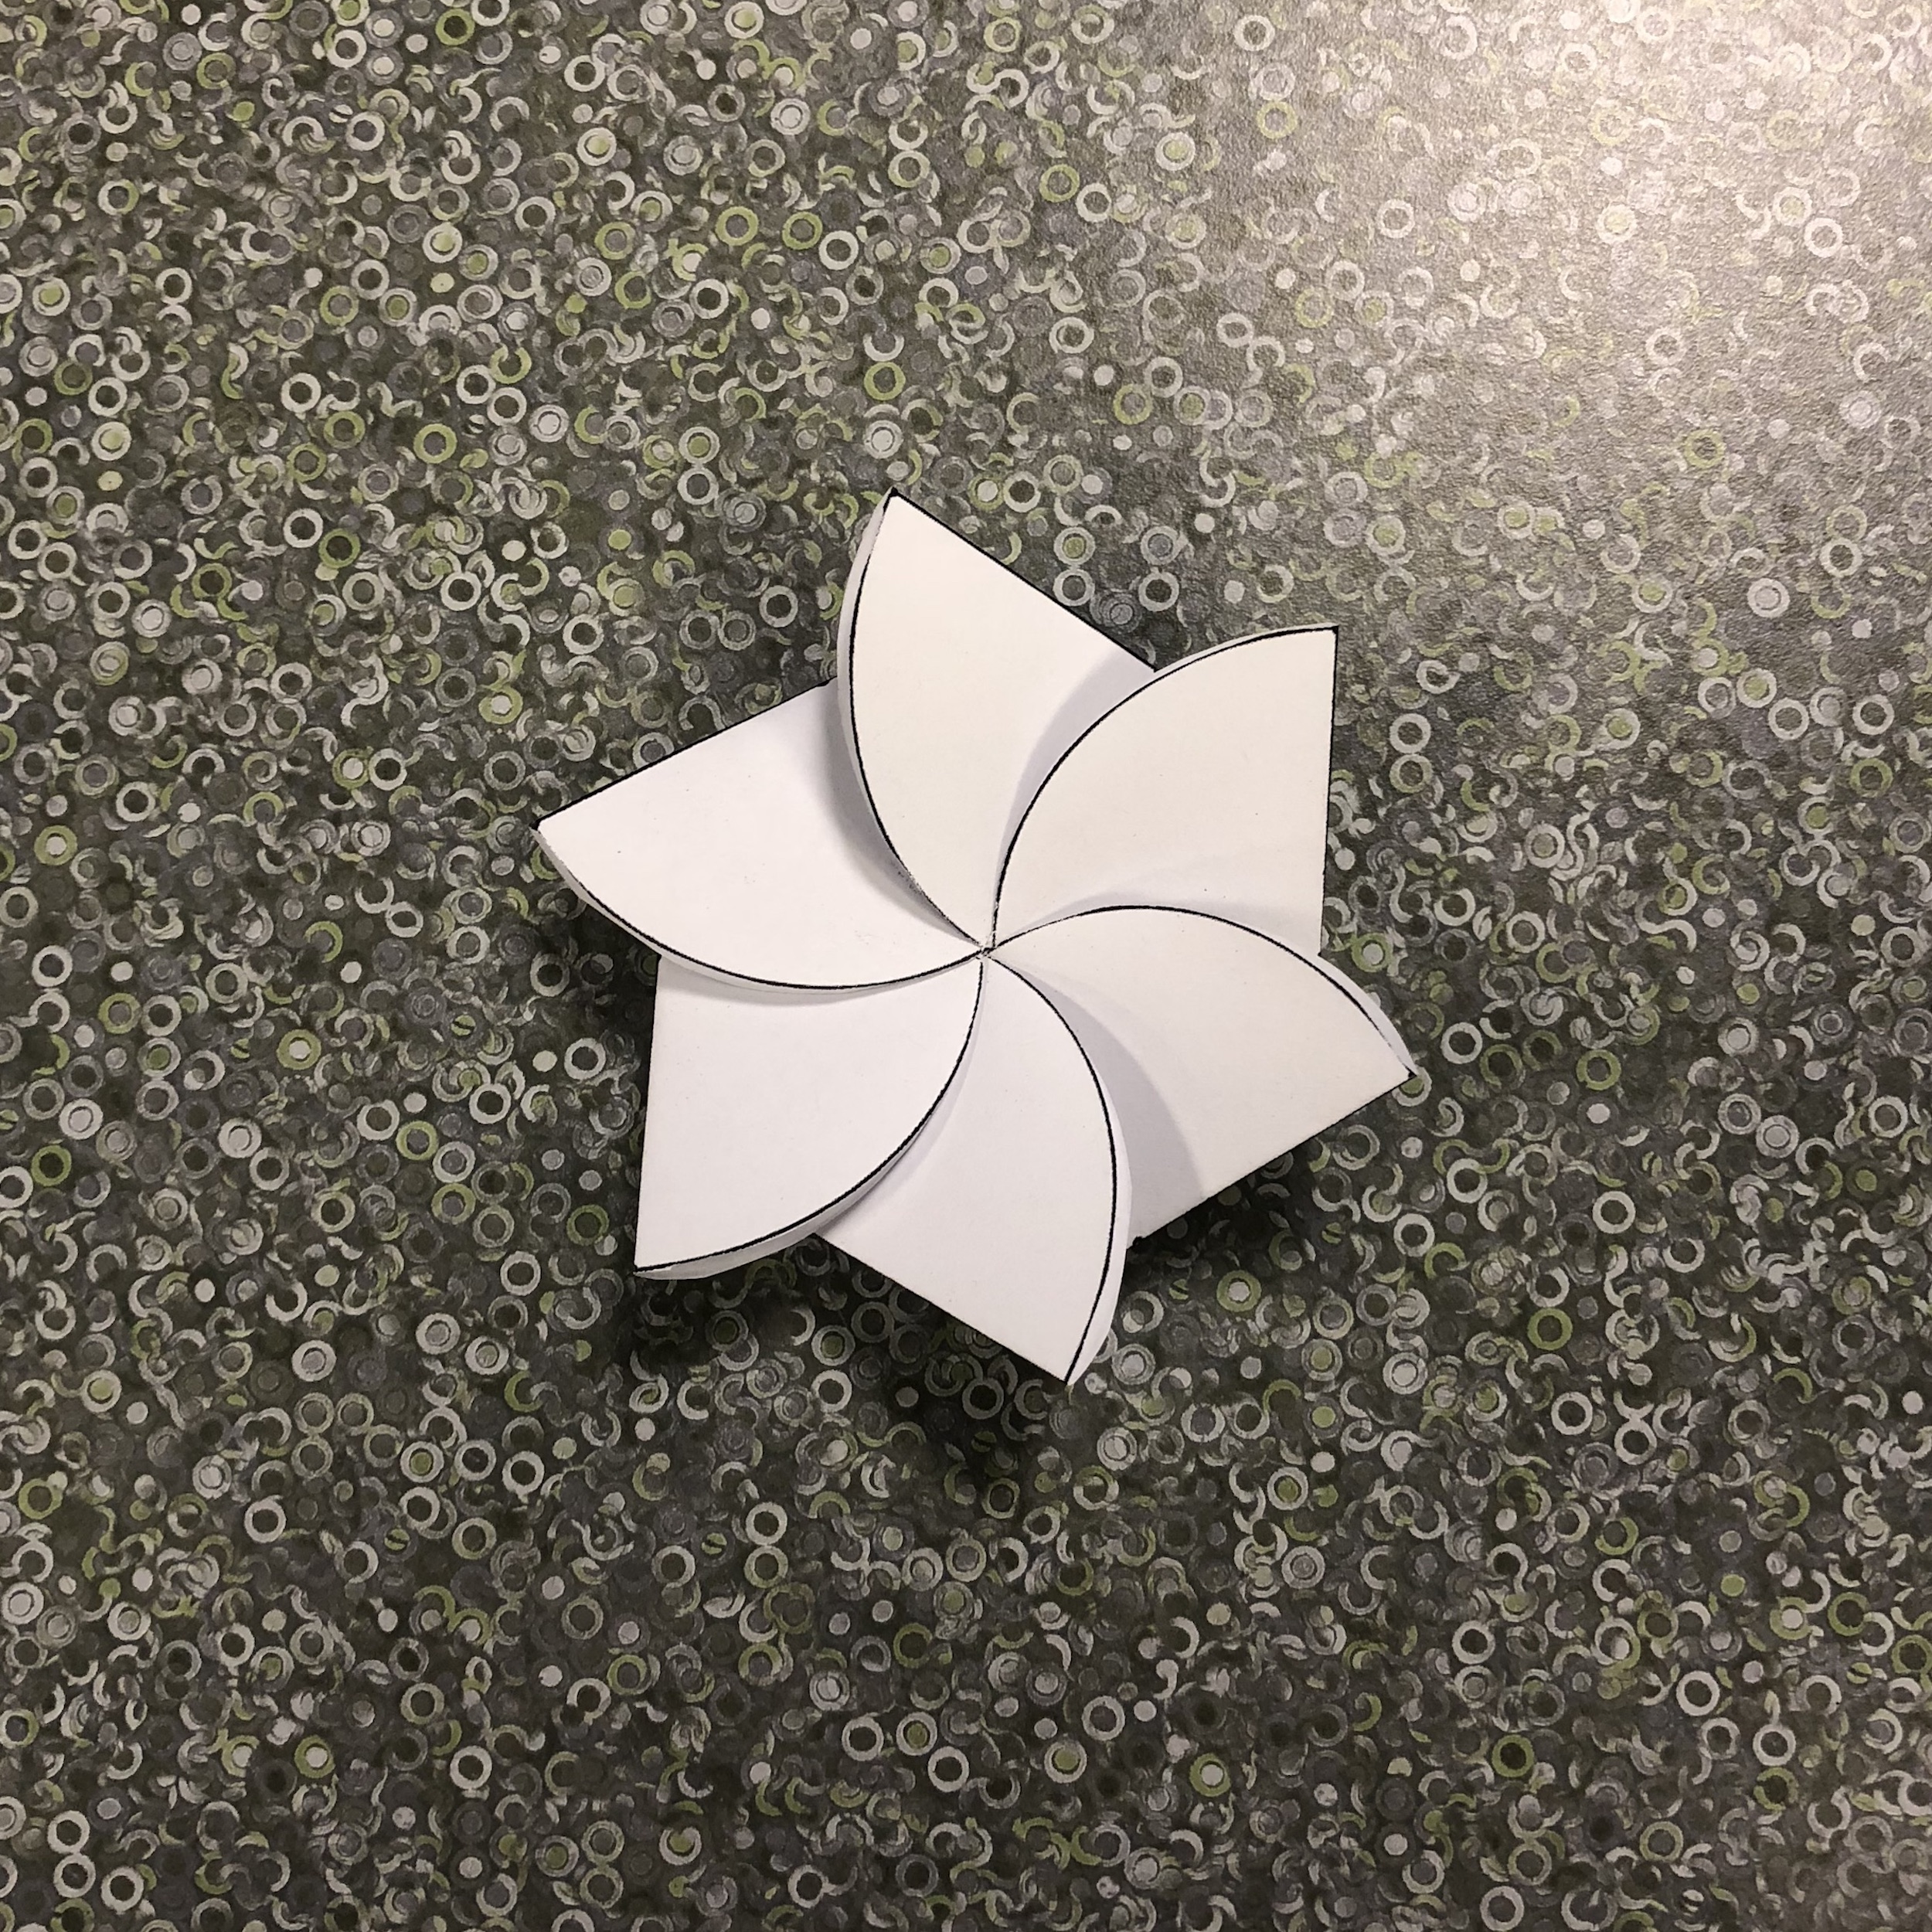
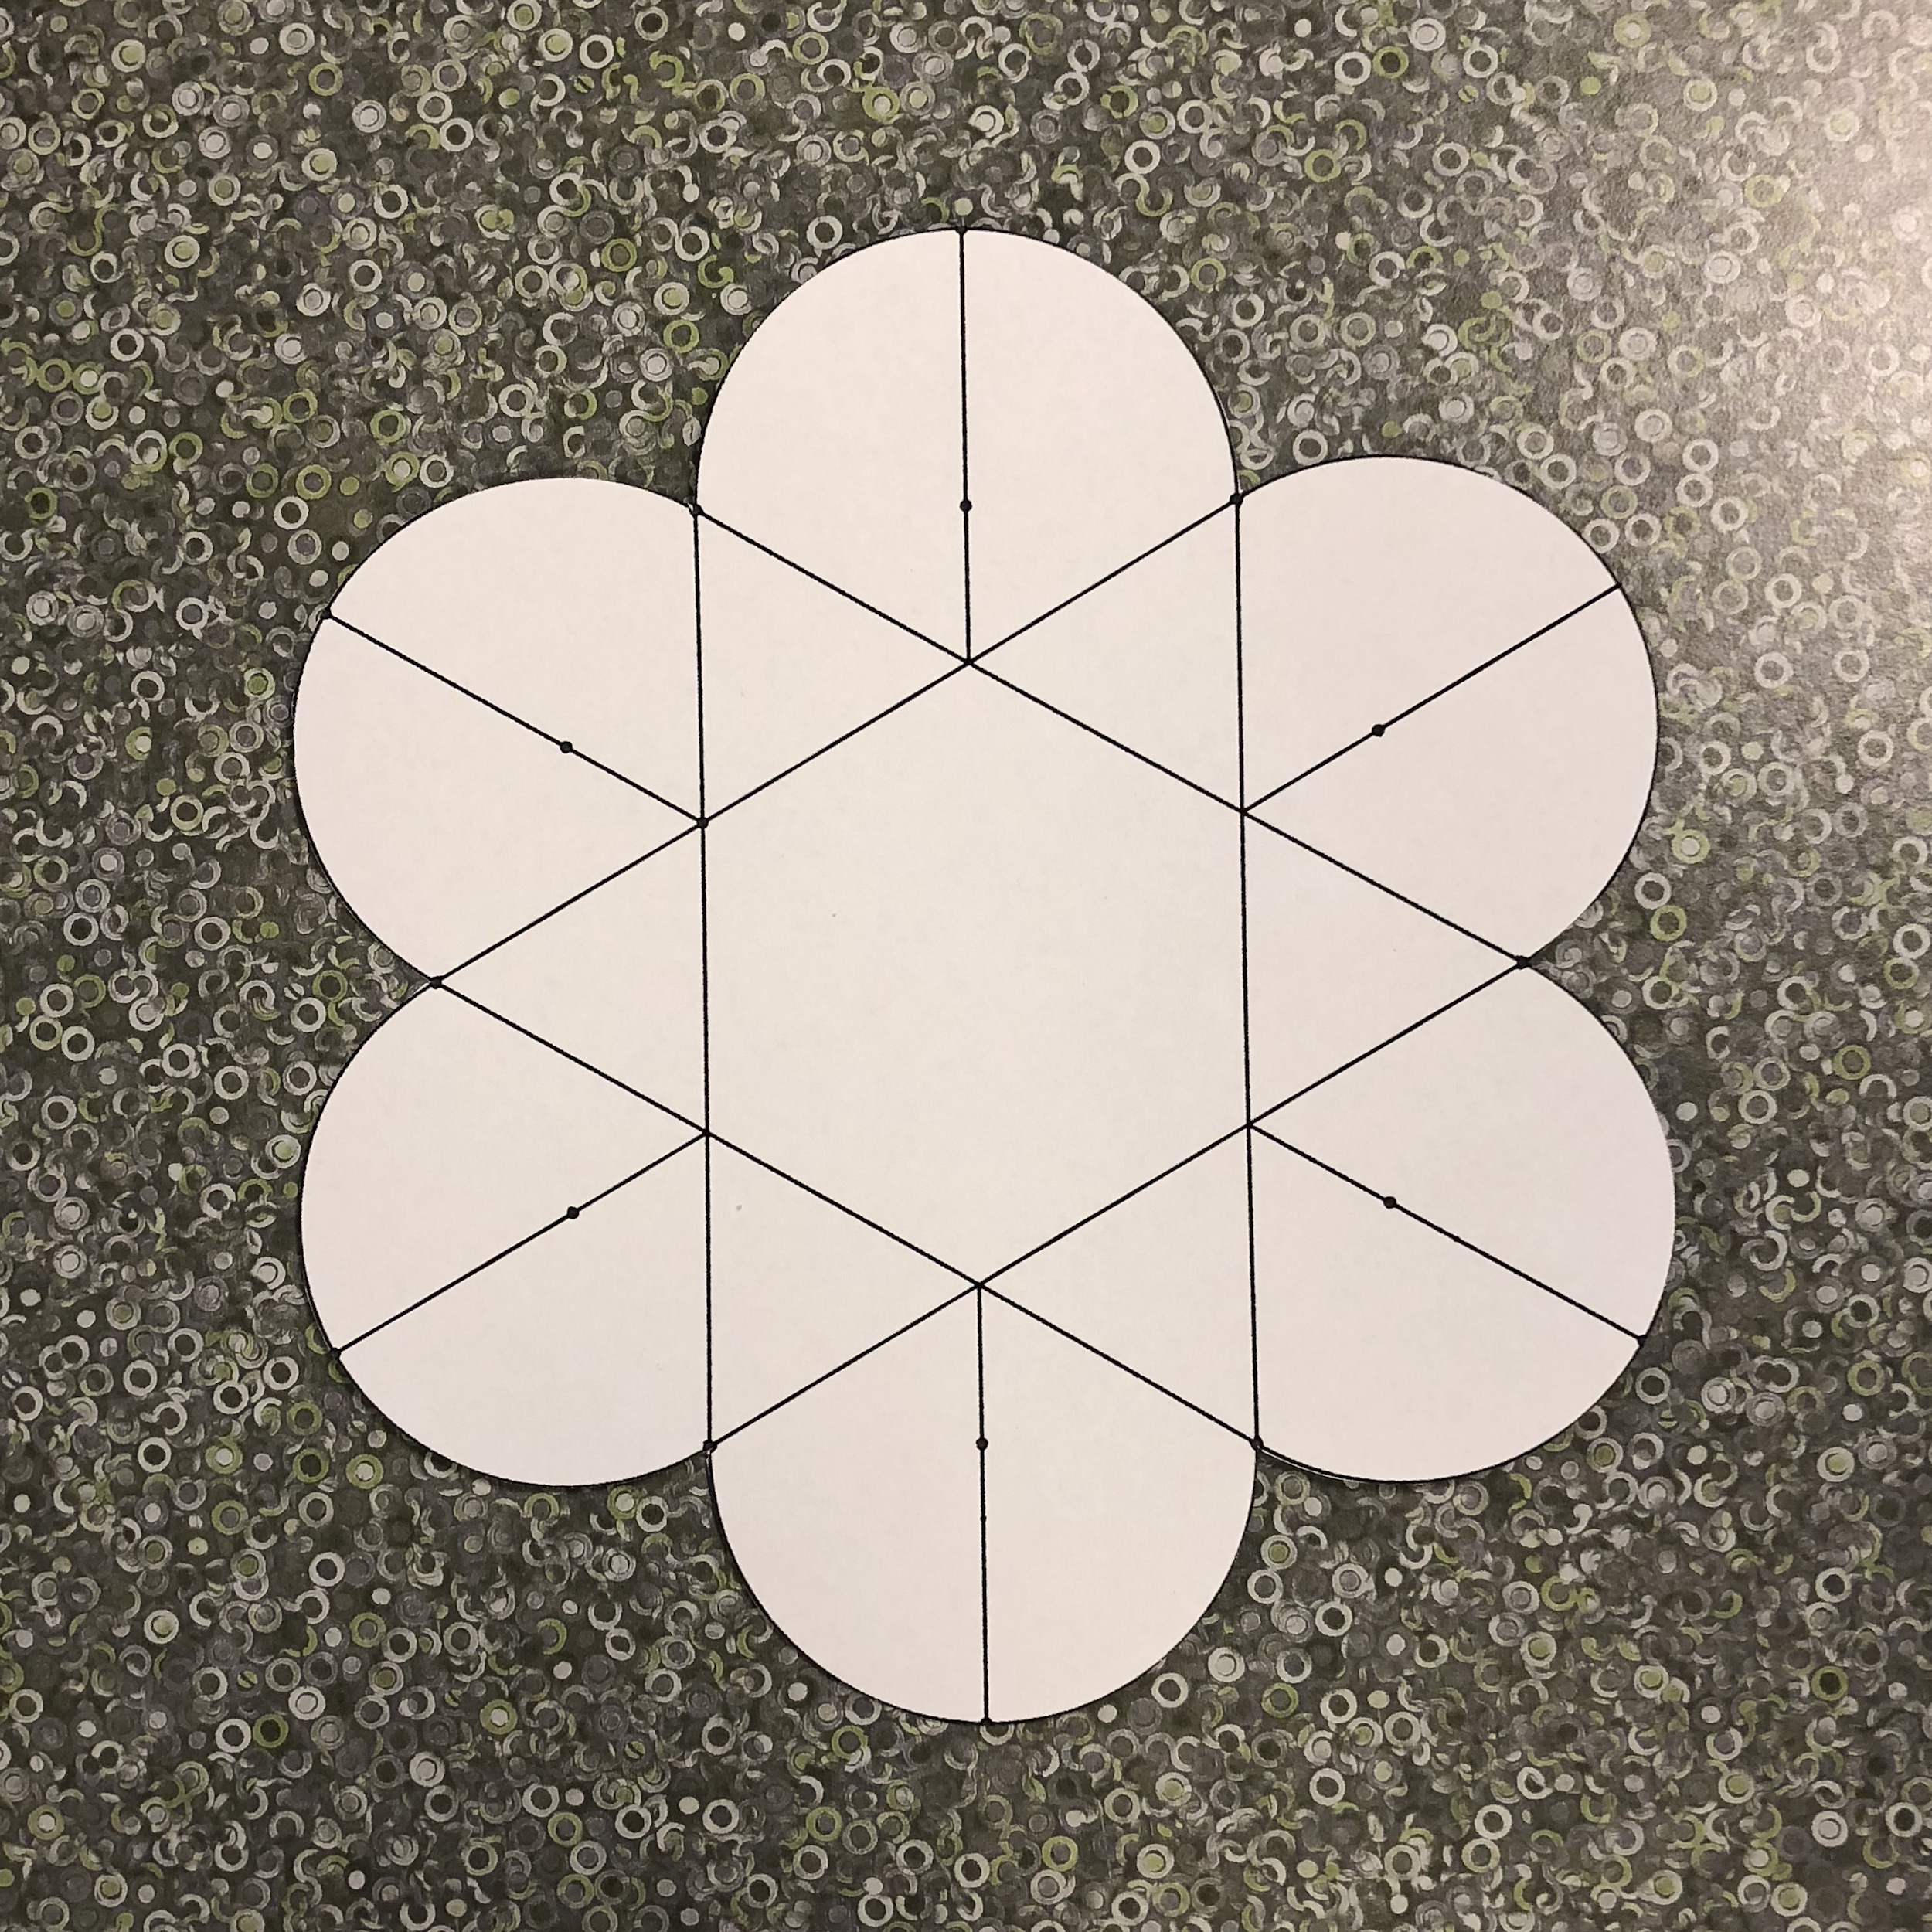
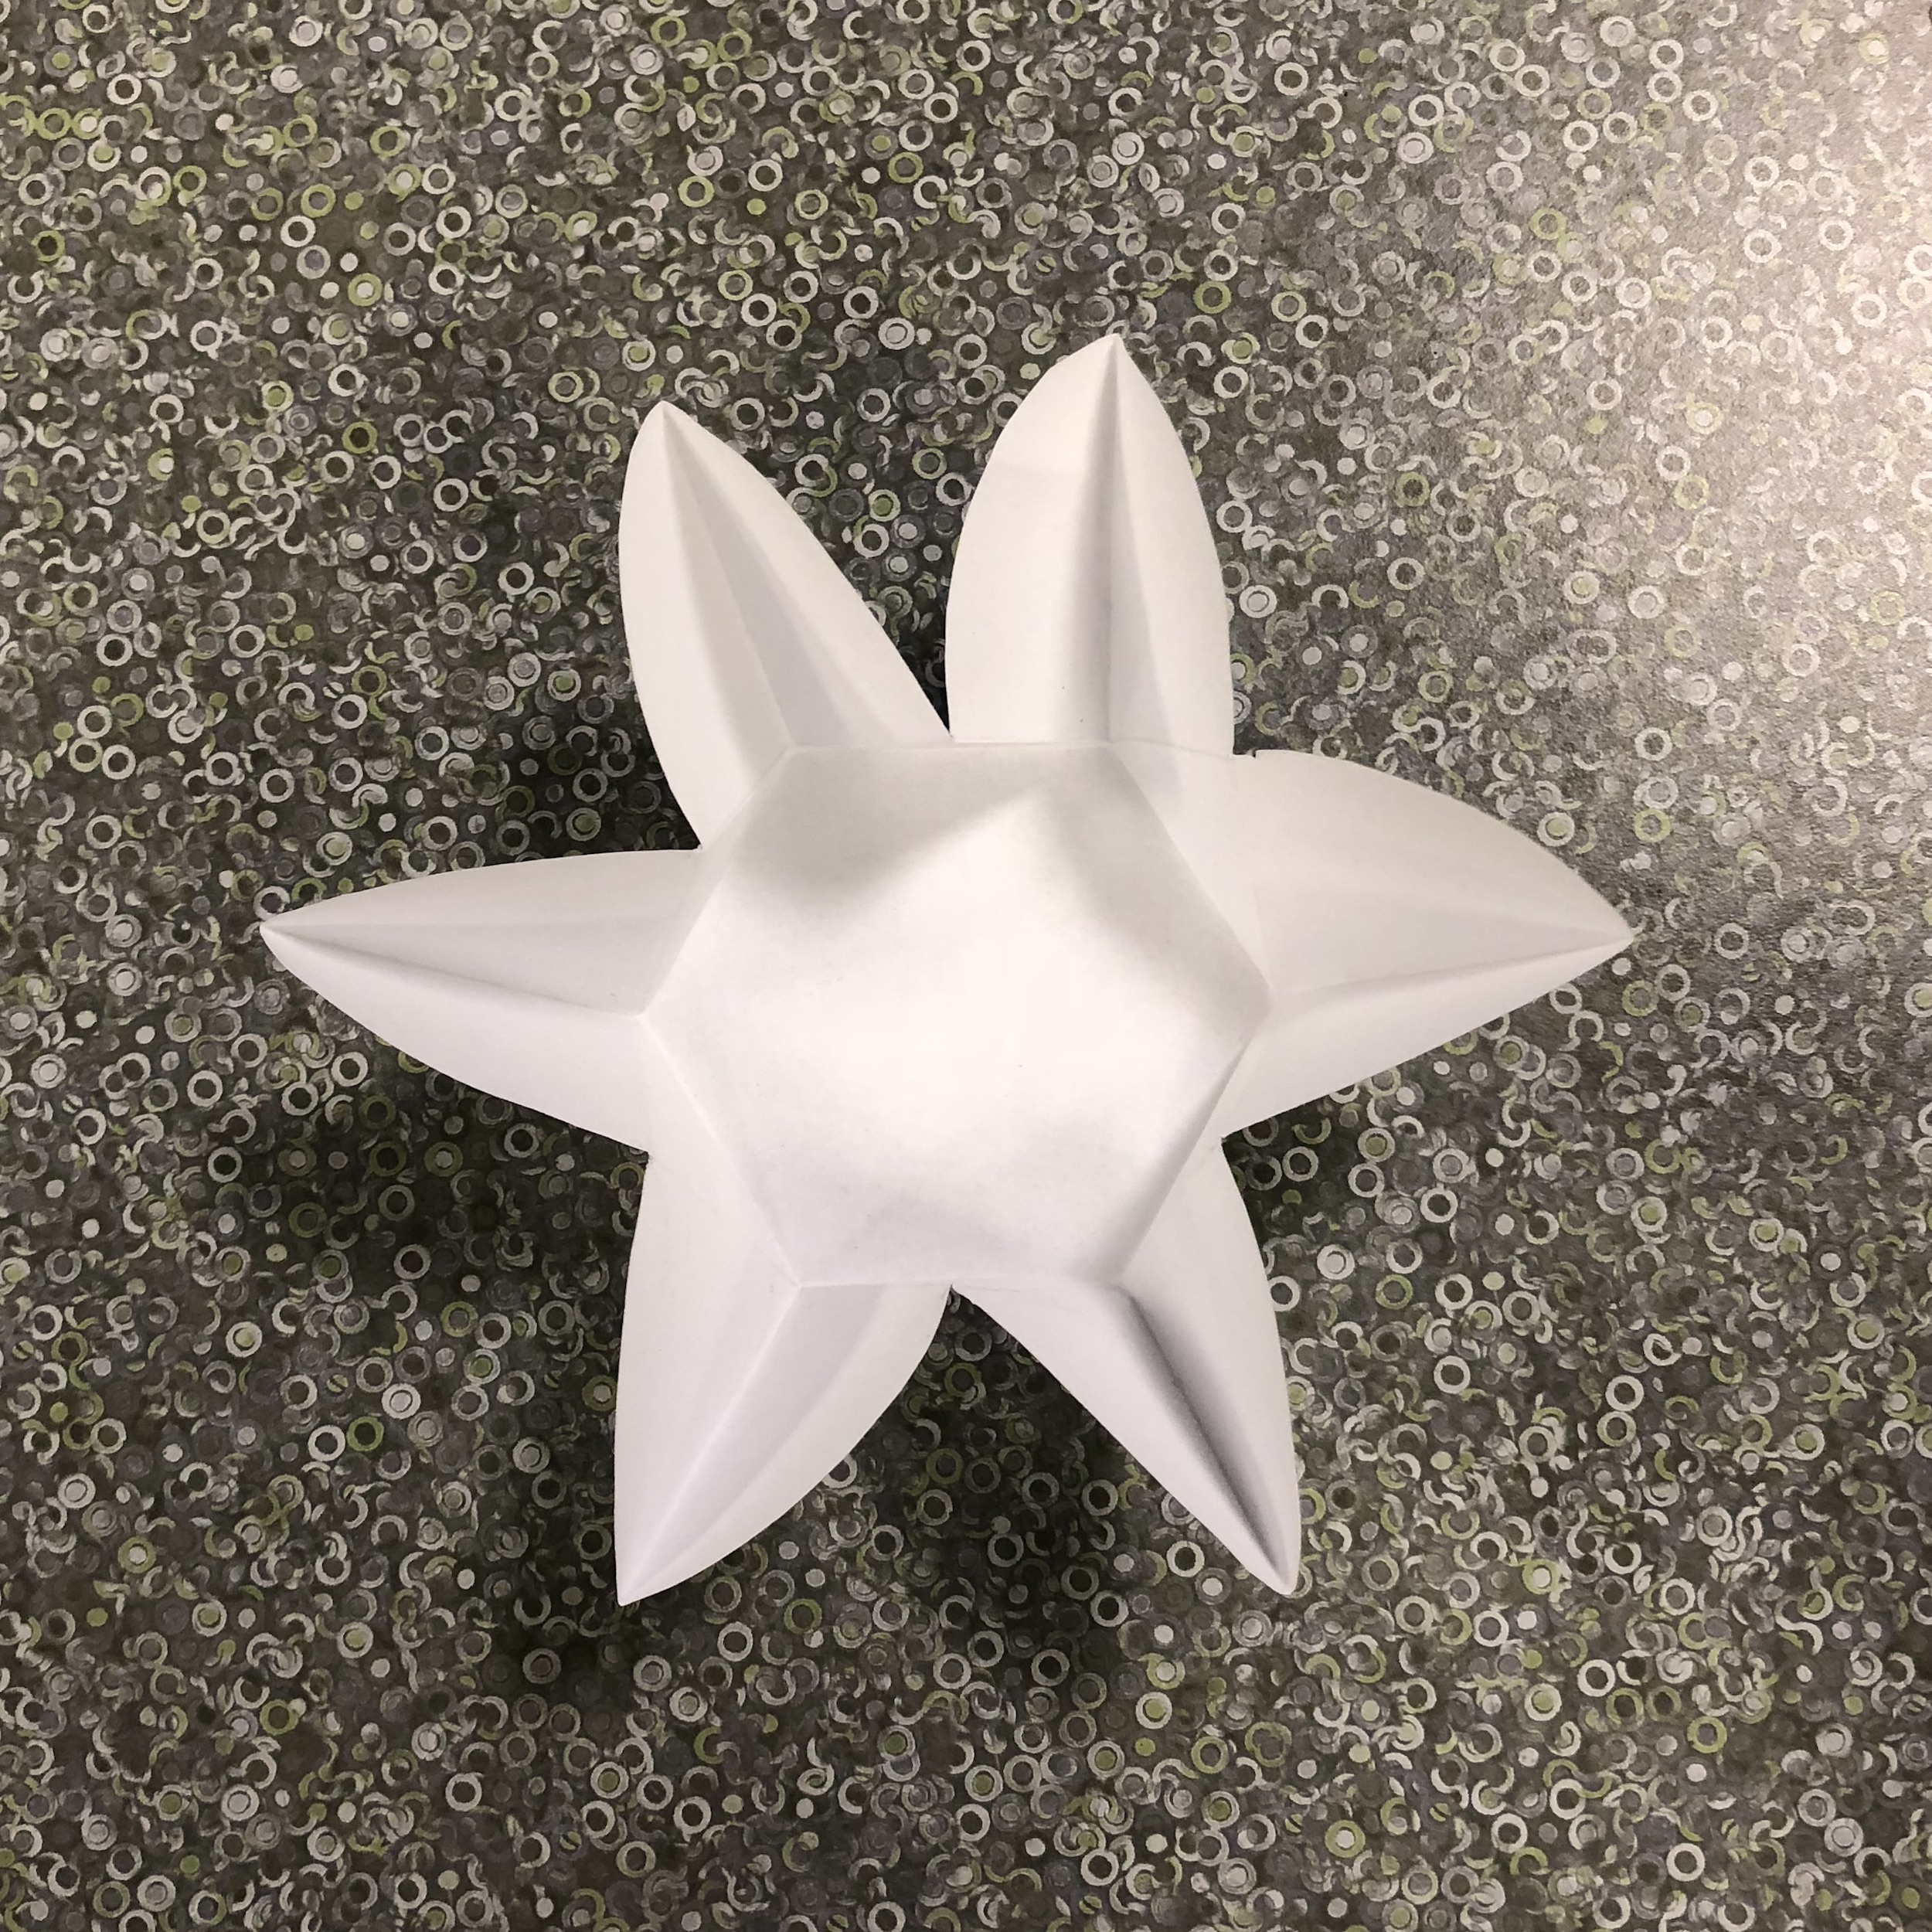
Our goal in this unit is to make the folded paper flower shown on the left. We first make its design, shown on the right, on a piece of cardstock.
Instructions
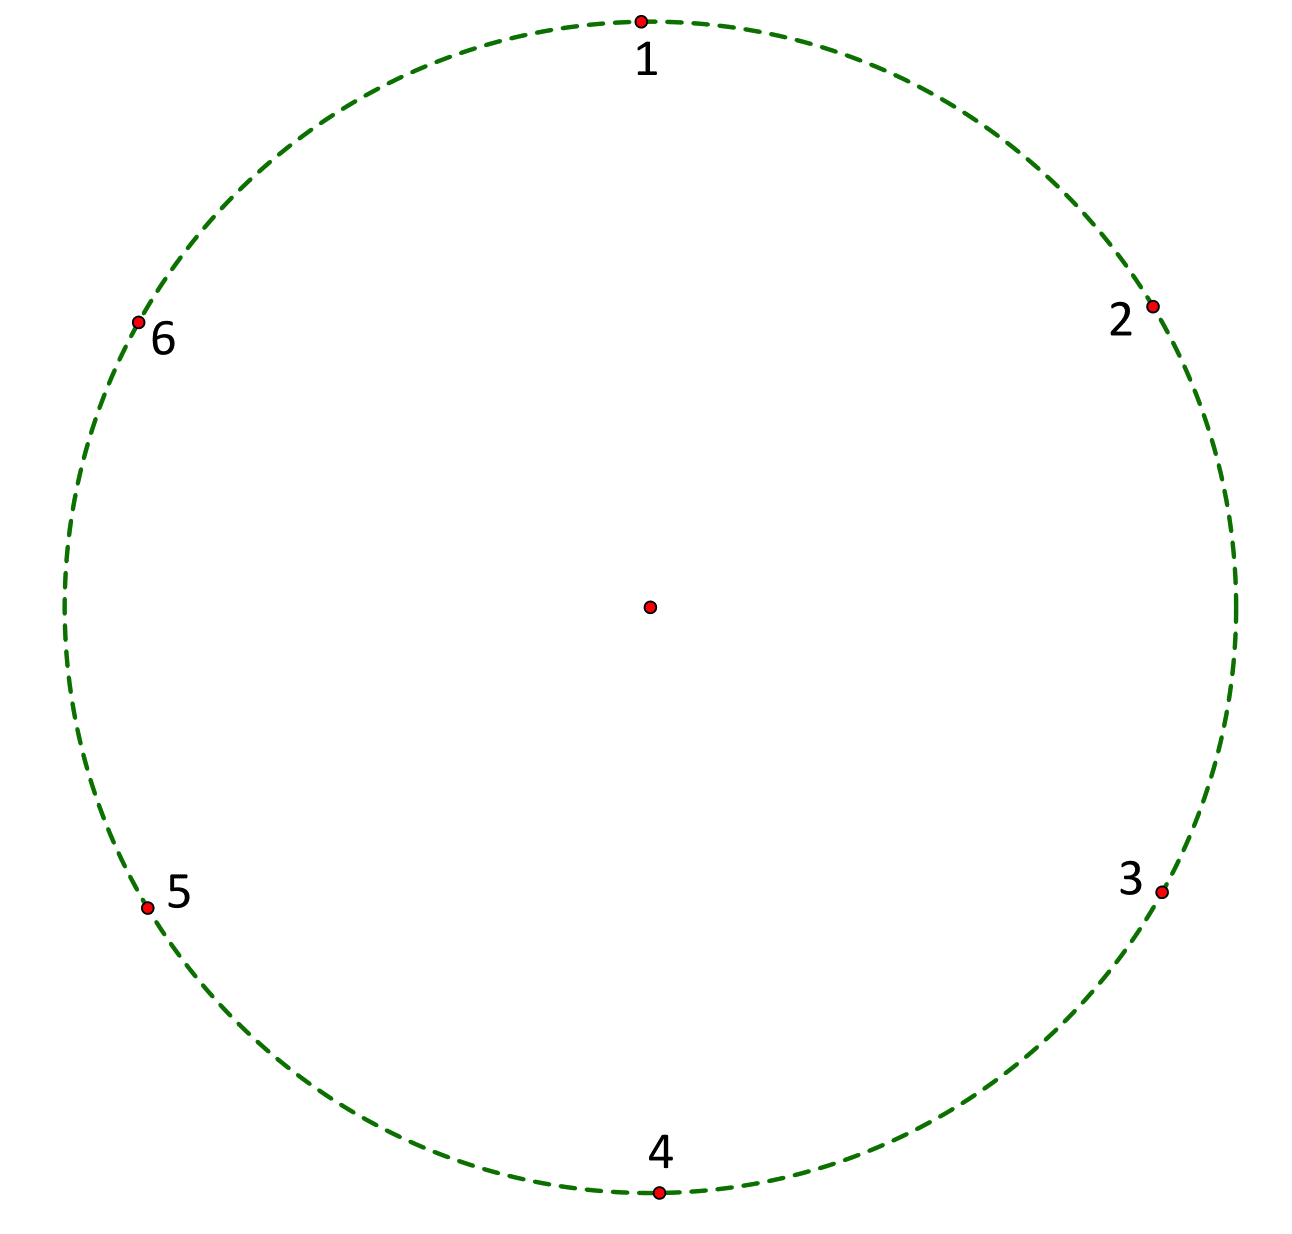
On an 8.5 inch by 11 inch sheet of cardstock, put a dot in the center.
Set your compass at three inches, and draw a circle with radius three
inches centered at the dot.
Using the same radius, make 6 equally spaced tick marks around the
circumference of the circle. They will be the vertices of a regular
hexagon. You may number them clockwise 1 through 6. (It does not matter
where you start)
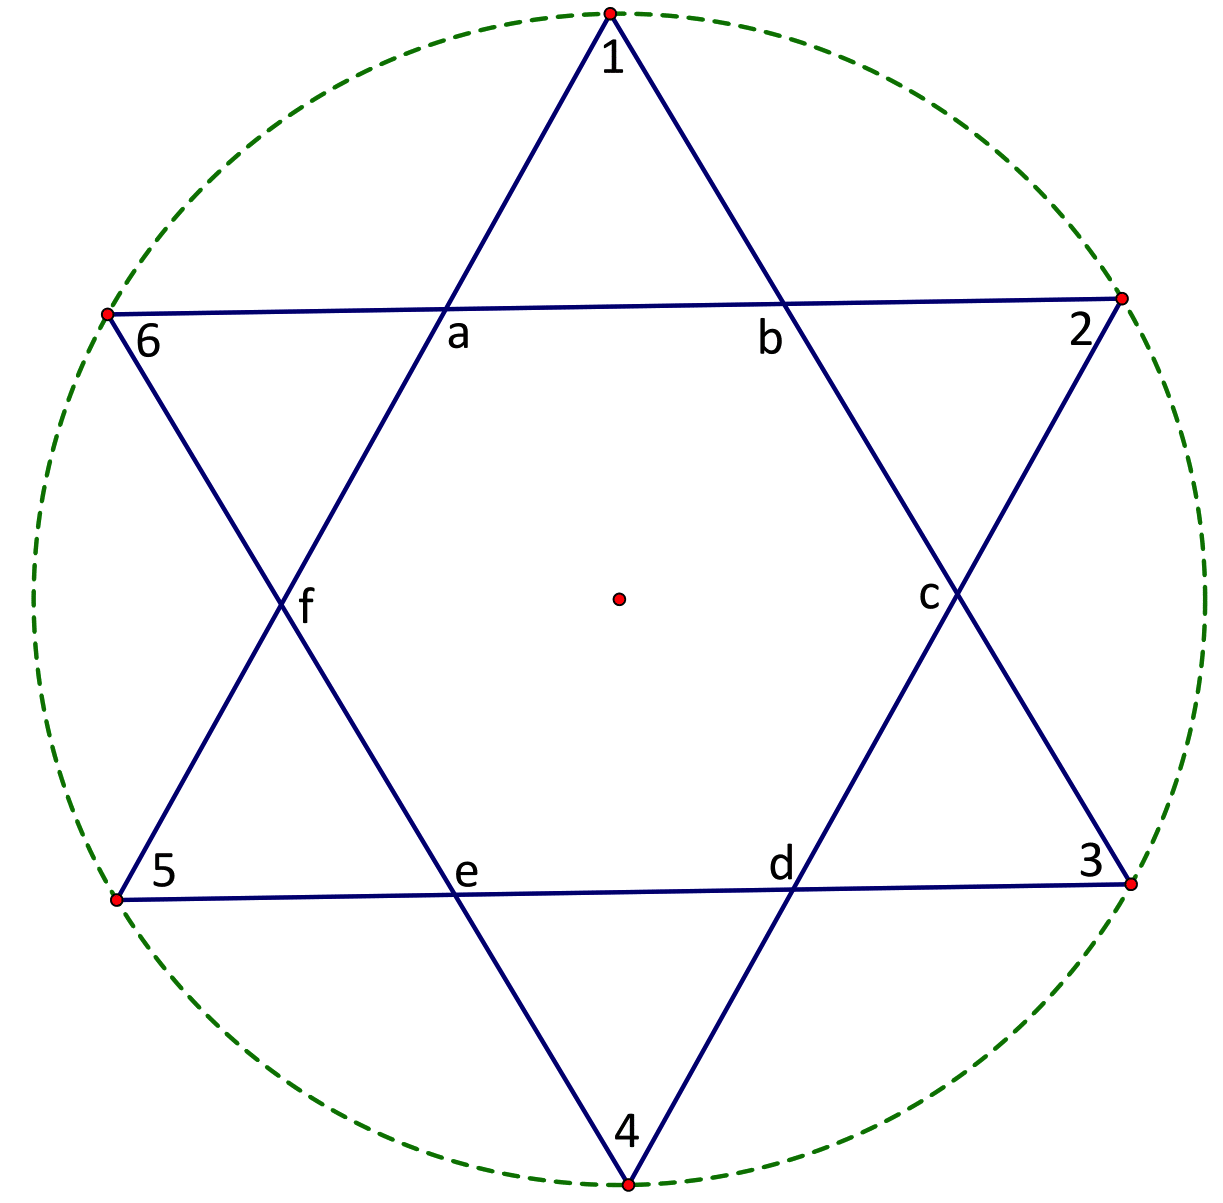
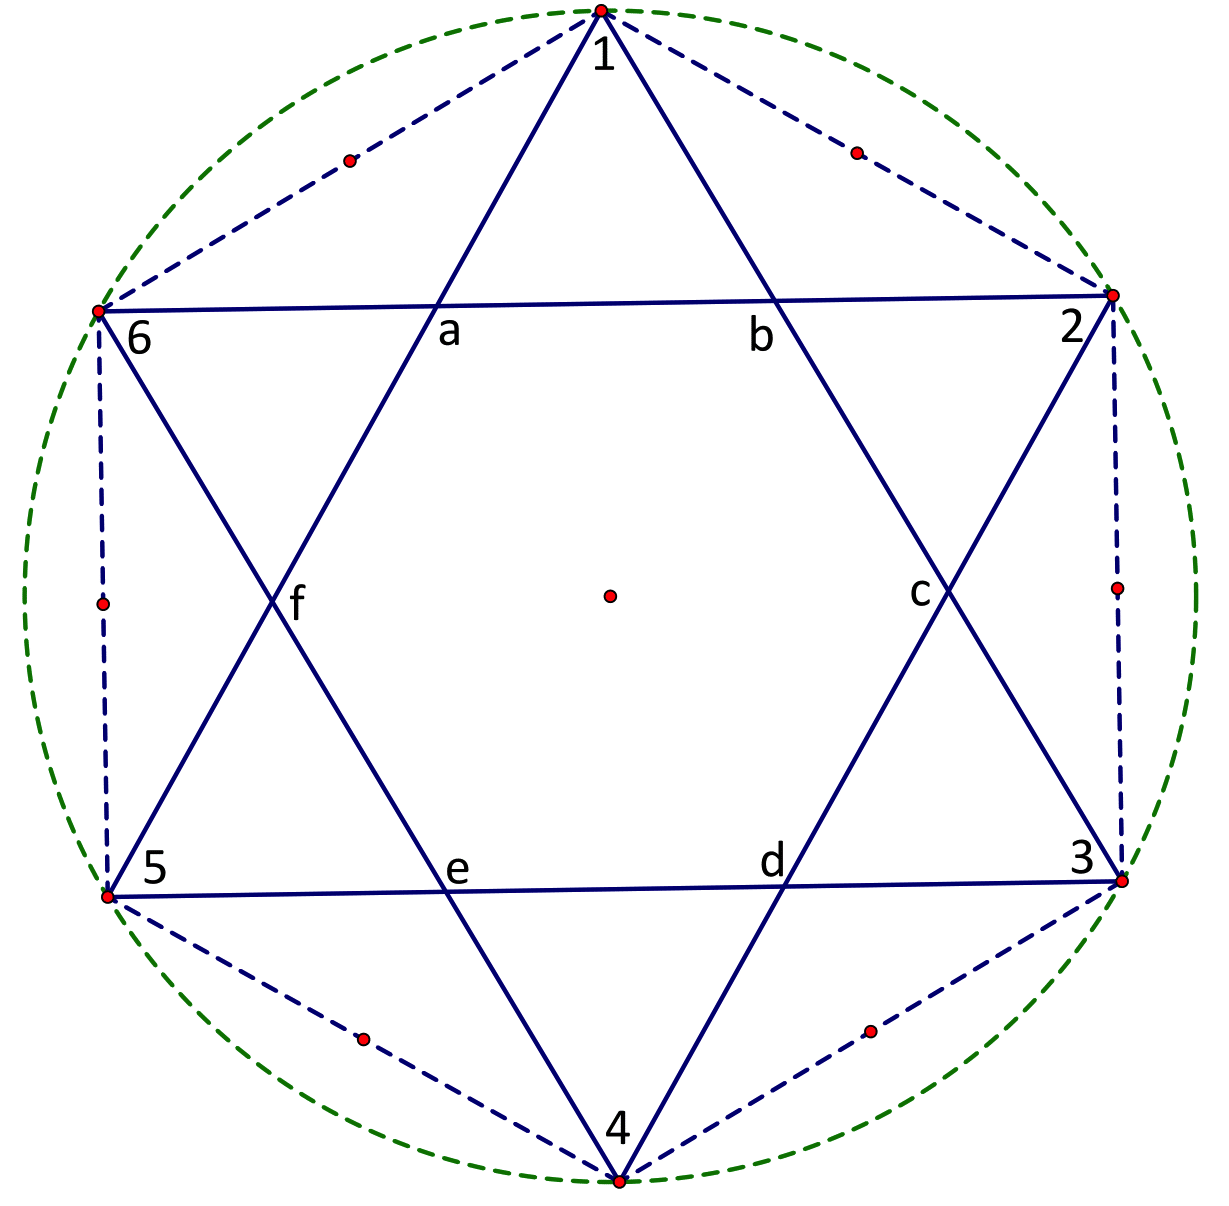
Draw two equilateral triangles by connecting points 1 and 3, 3 and 5,
and 5 and 1 for the first triangle, and 2 and 4, 4 and 6, and 6 and 2
for the second triangle. In the center of the two triangles you will
see a small hexagon. You may label its six vertices a, b, c, d, e, and f,
going clockwise. It does not matter where you start.
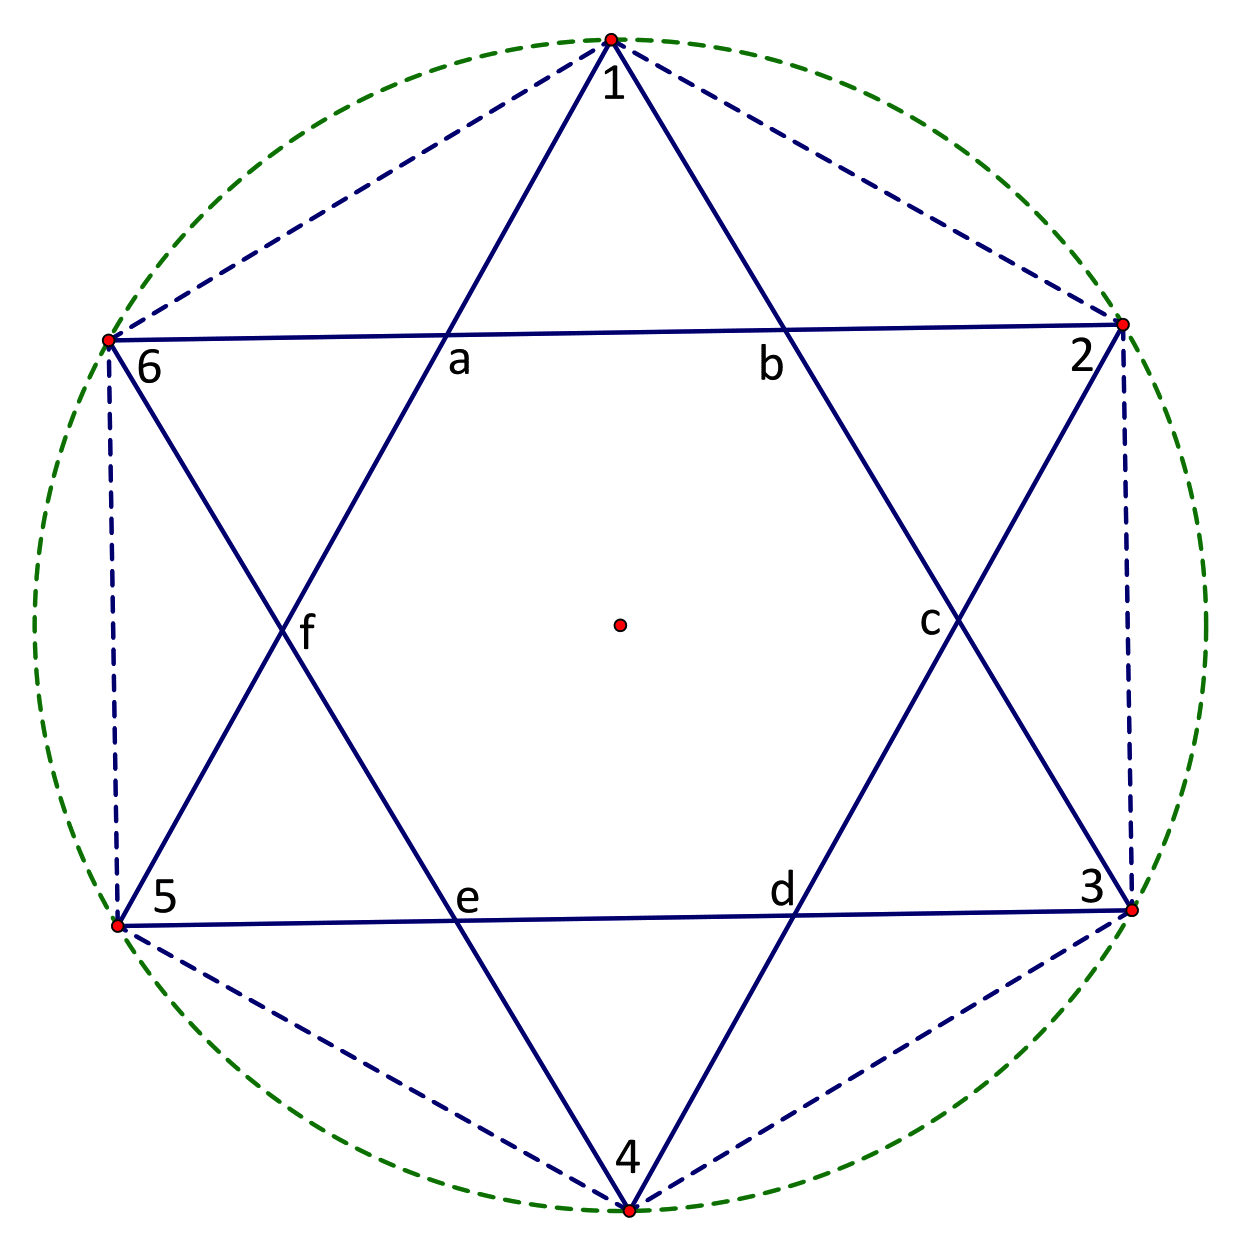
Now, very lightly connect 1 to 2 to 3 to 4 to 5 to 6 to 1. You have a big
hexagon.
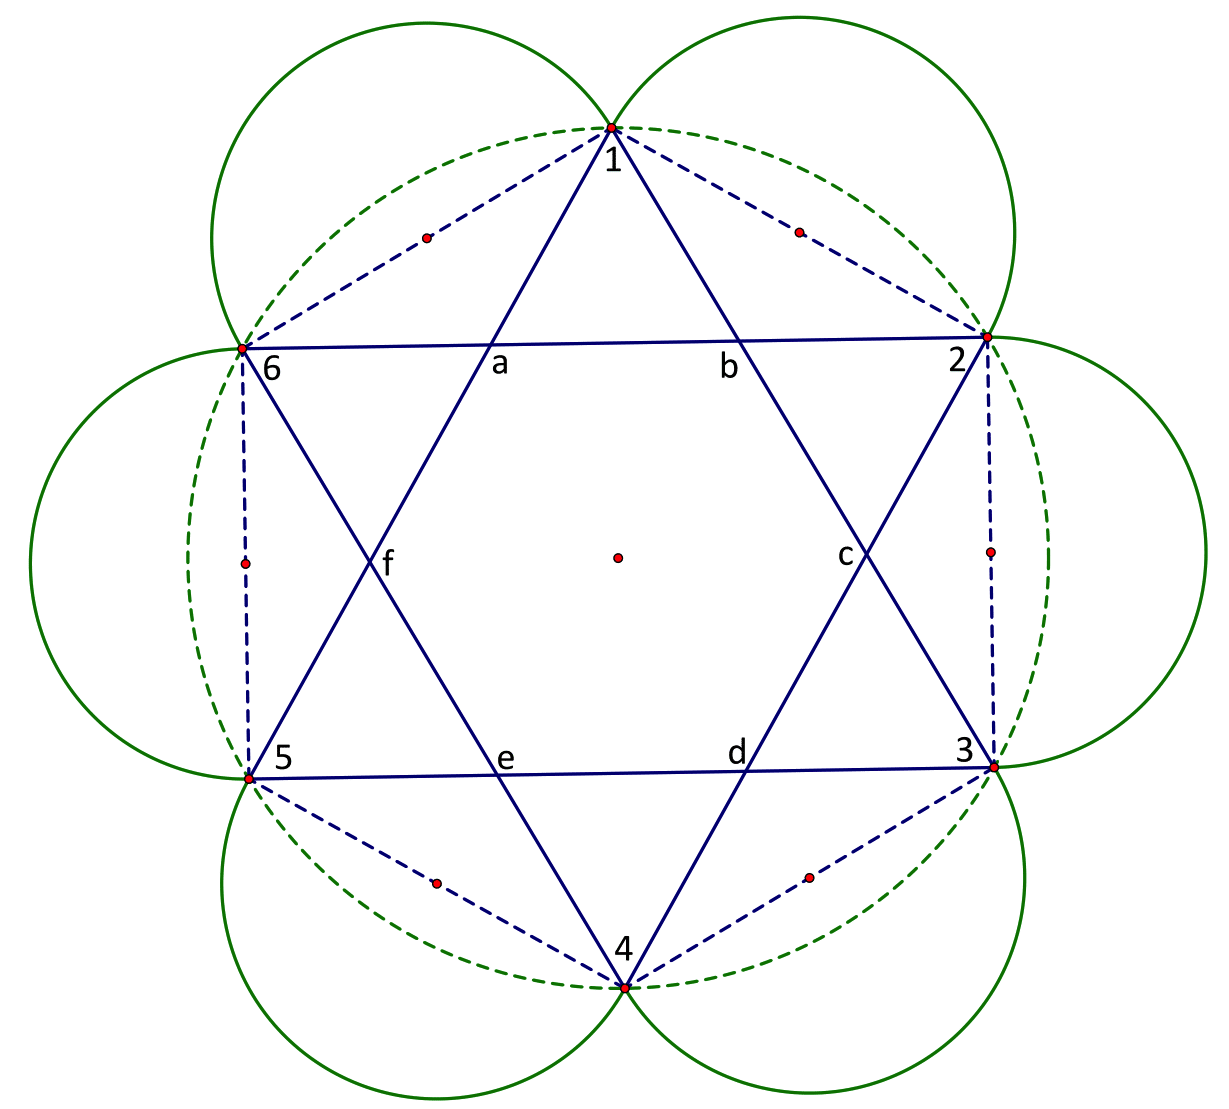
Next, you need to find the midpoints of the six sides of the big hexagon.
There are several ways to do this. One is to place your ruler as if you
were connecting a to d, and mark the centers of two oppposite sides. Then,
put your ruler between b and c, and finally between c and f, each time marking
two centers.
With the centers marked, set your compass to half the distance of the length
of the side of the large hexagon, and draw six half circles, centered at the
midpoints of the sides. See the diagram for reference.
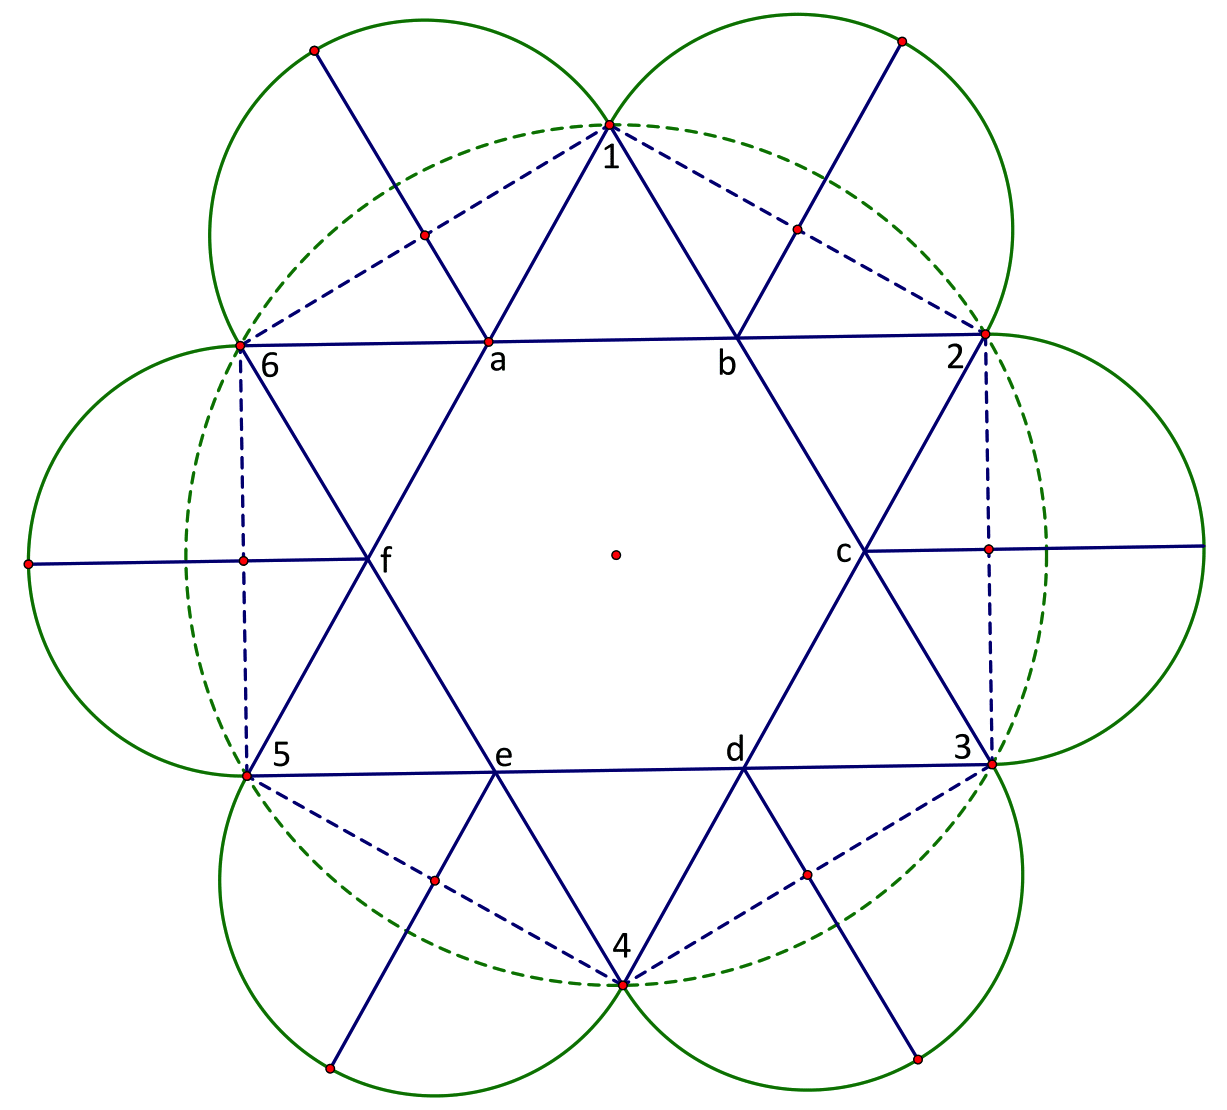
You are almost there! Draw six more segments, each beginning at a, b, c, d,
e, and f, and extending through the center of the half circle to the half
circle's circumference.
You now have the complete drawing. With a ruler and the point of your compass,
score along all the solid straight lines in the drawing. (Do NOT score around the large
dotted hexagon). After the lines are scored, carefully cut out the figure.
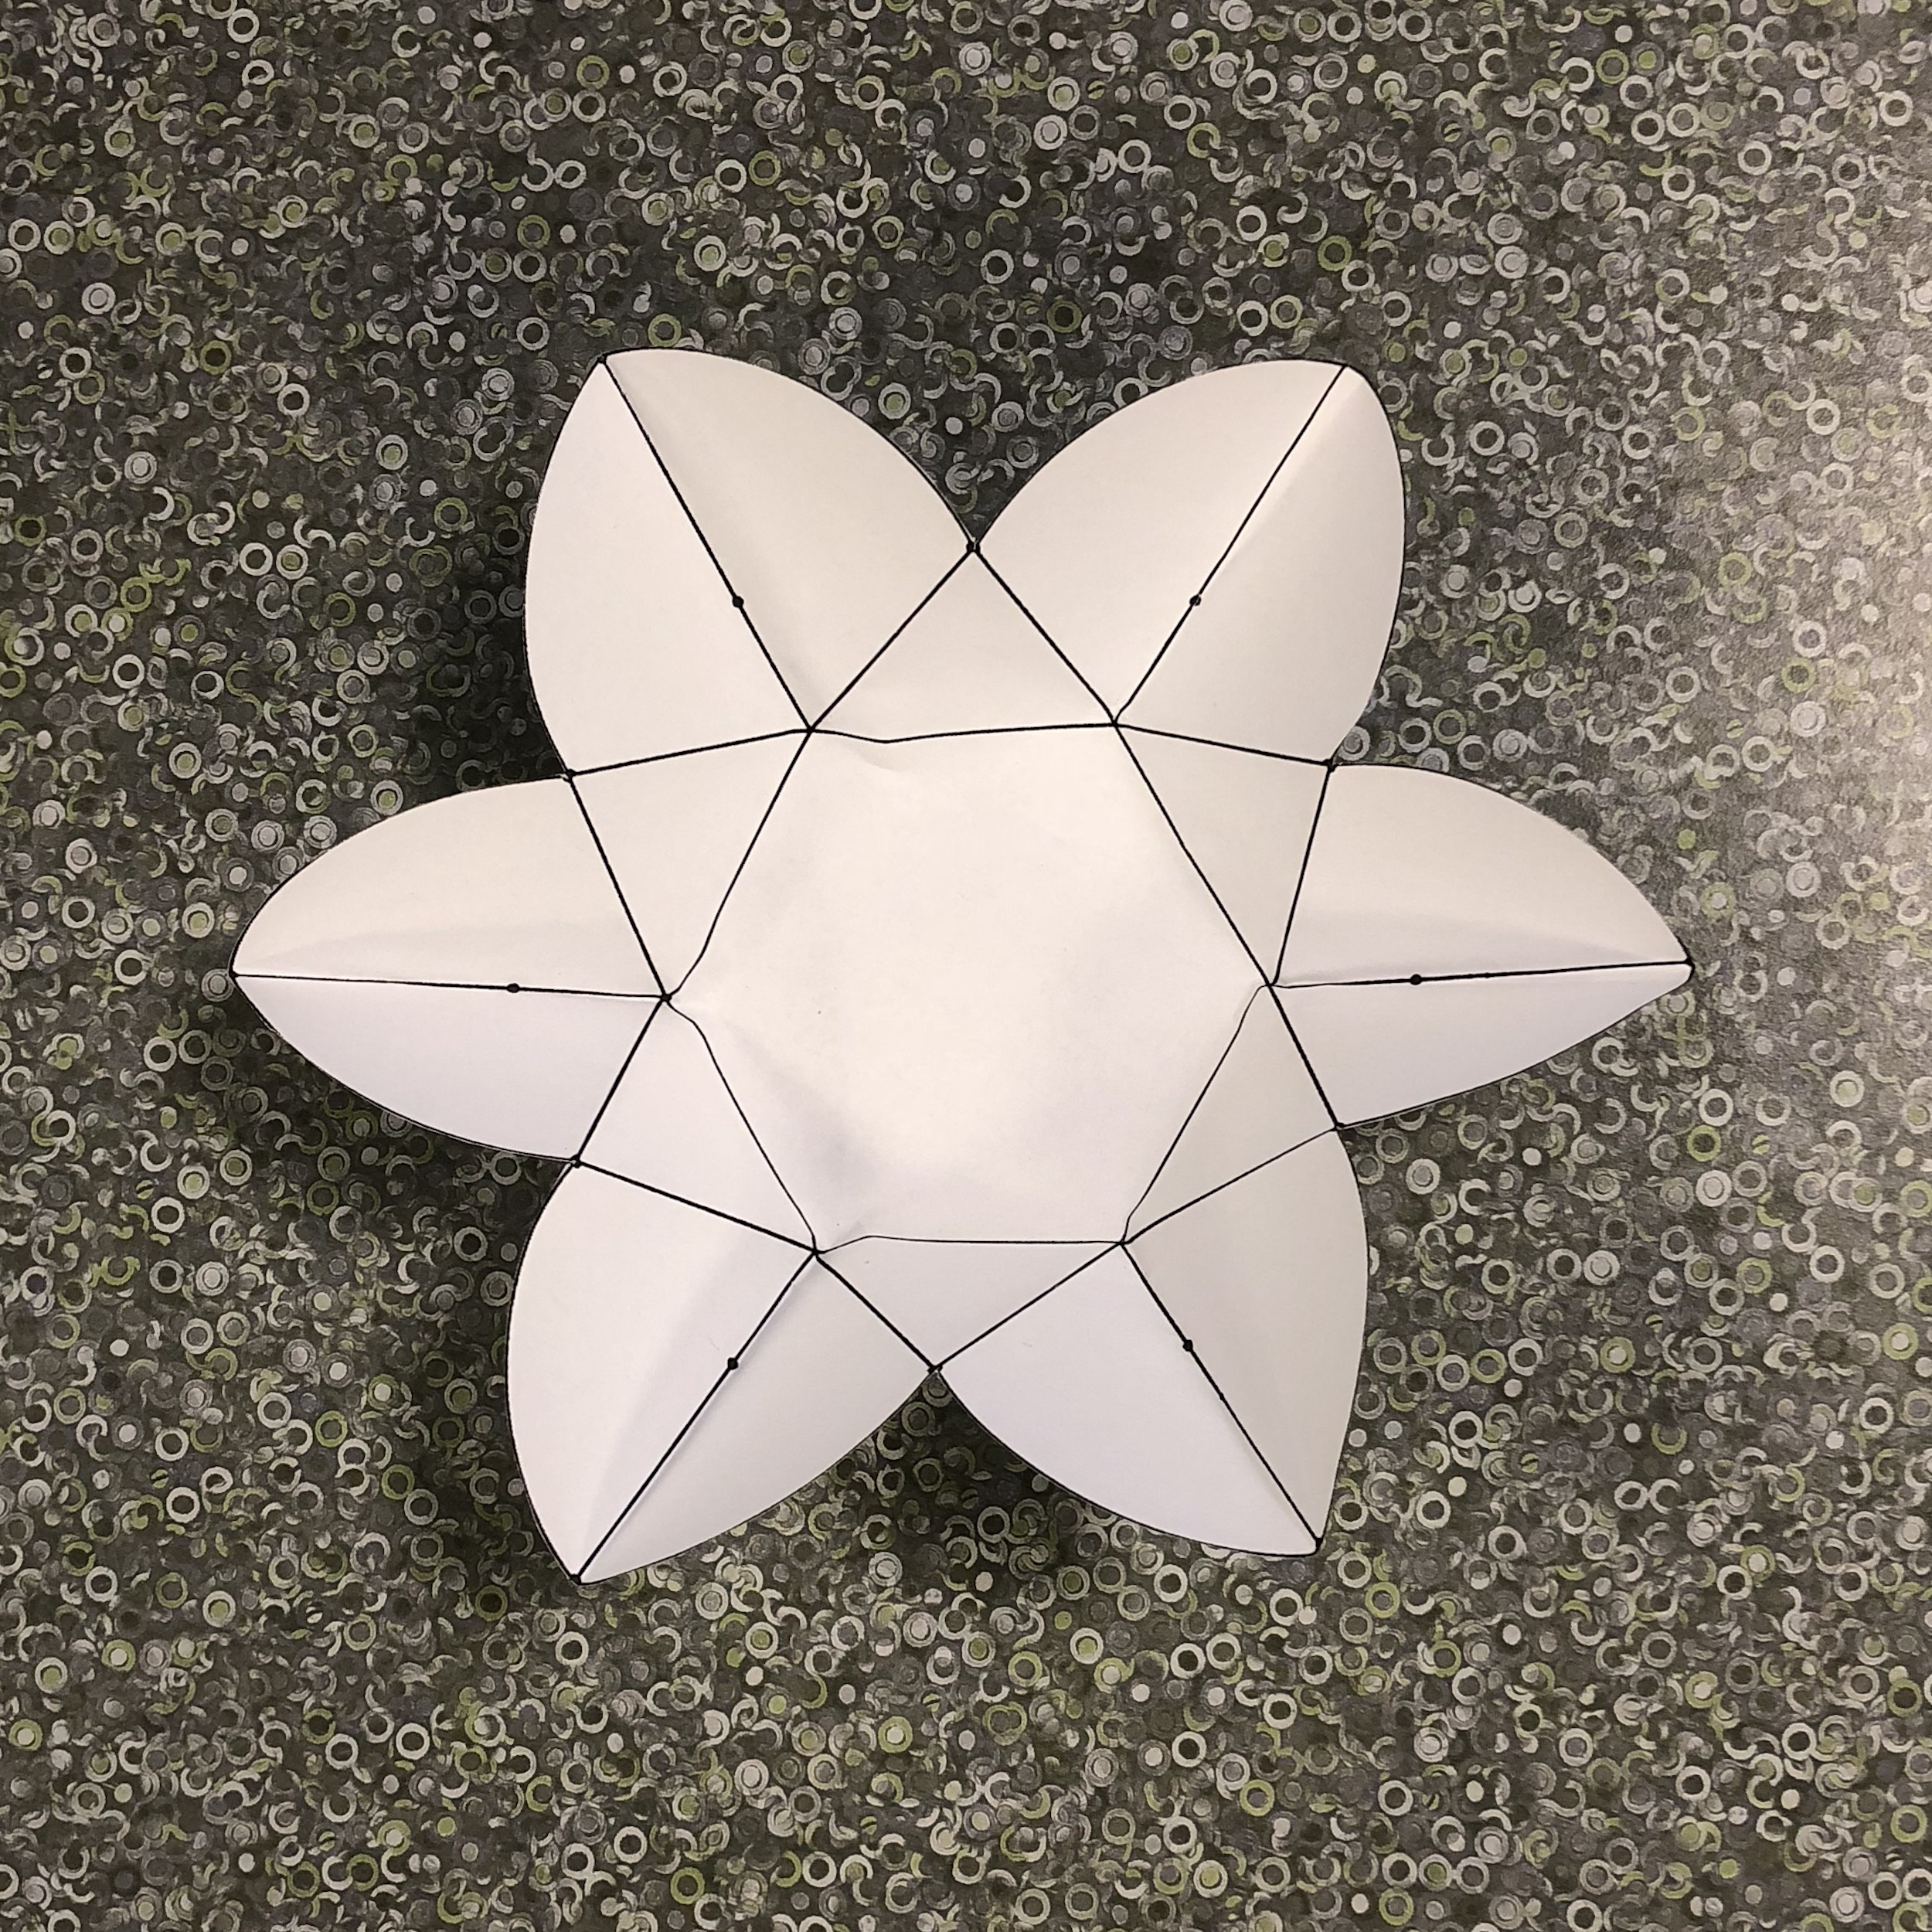
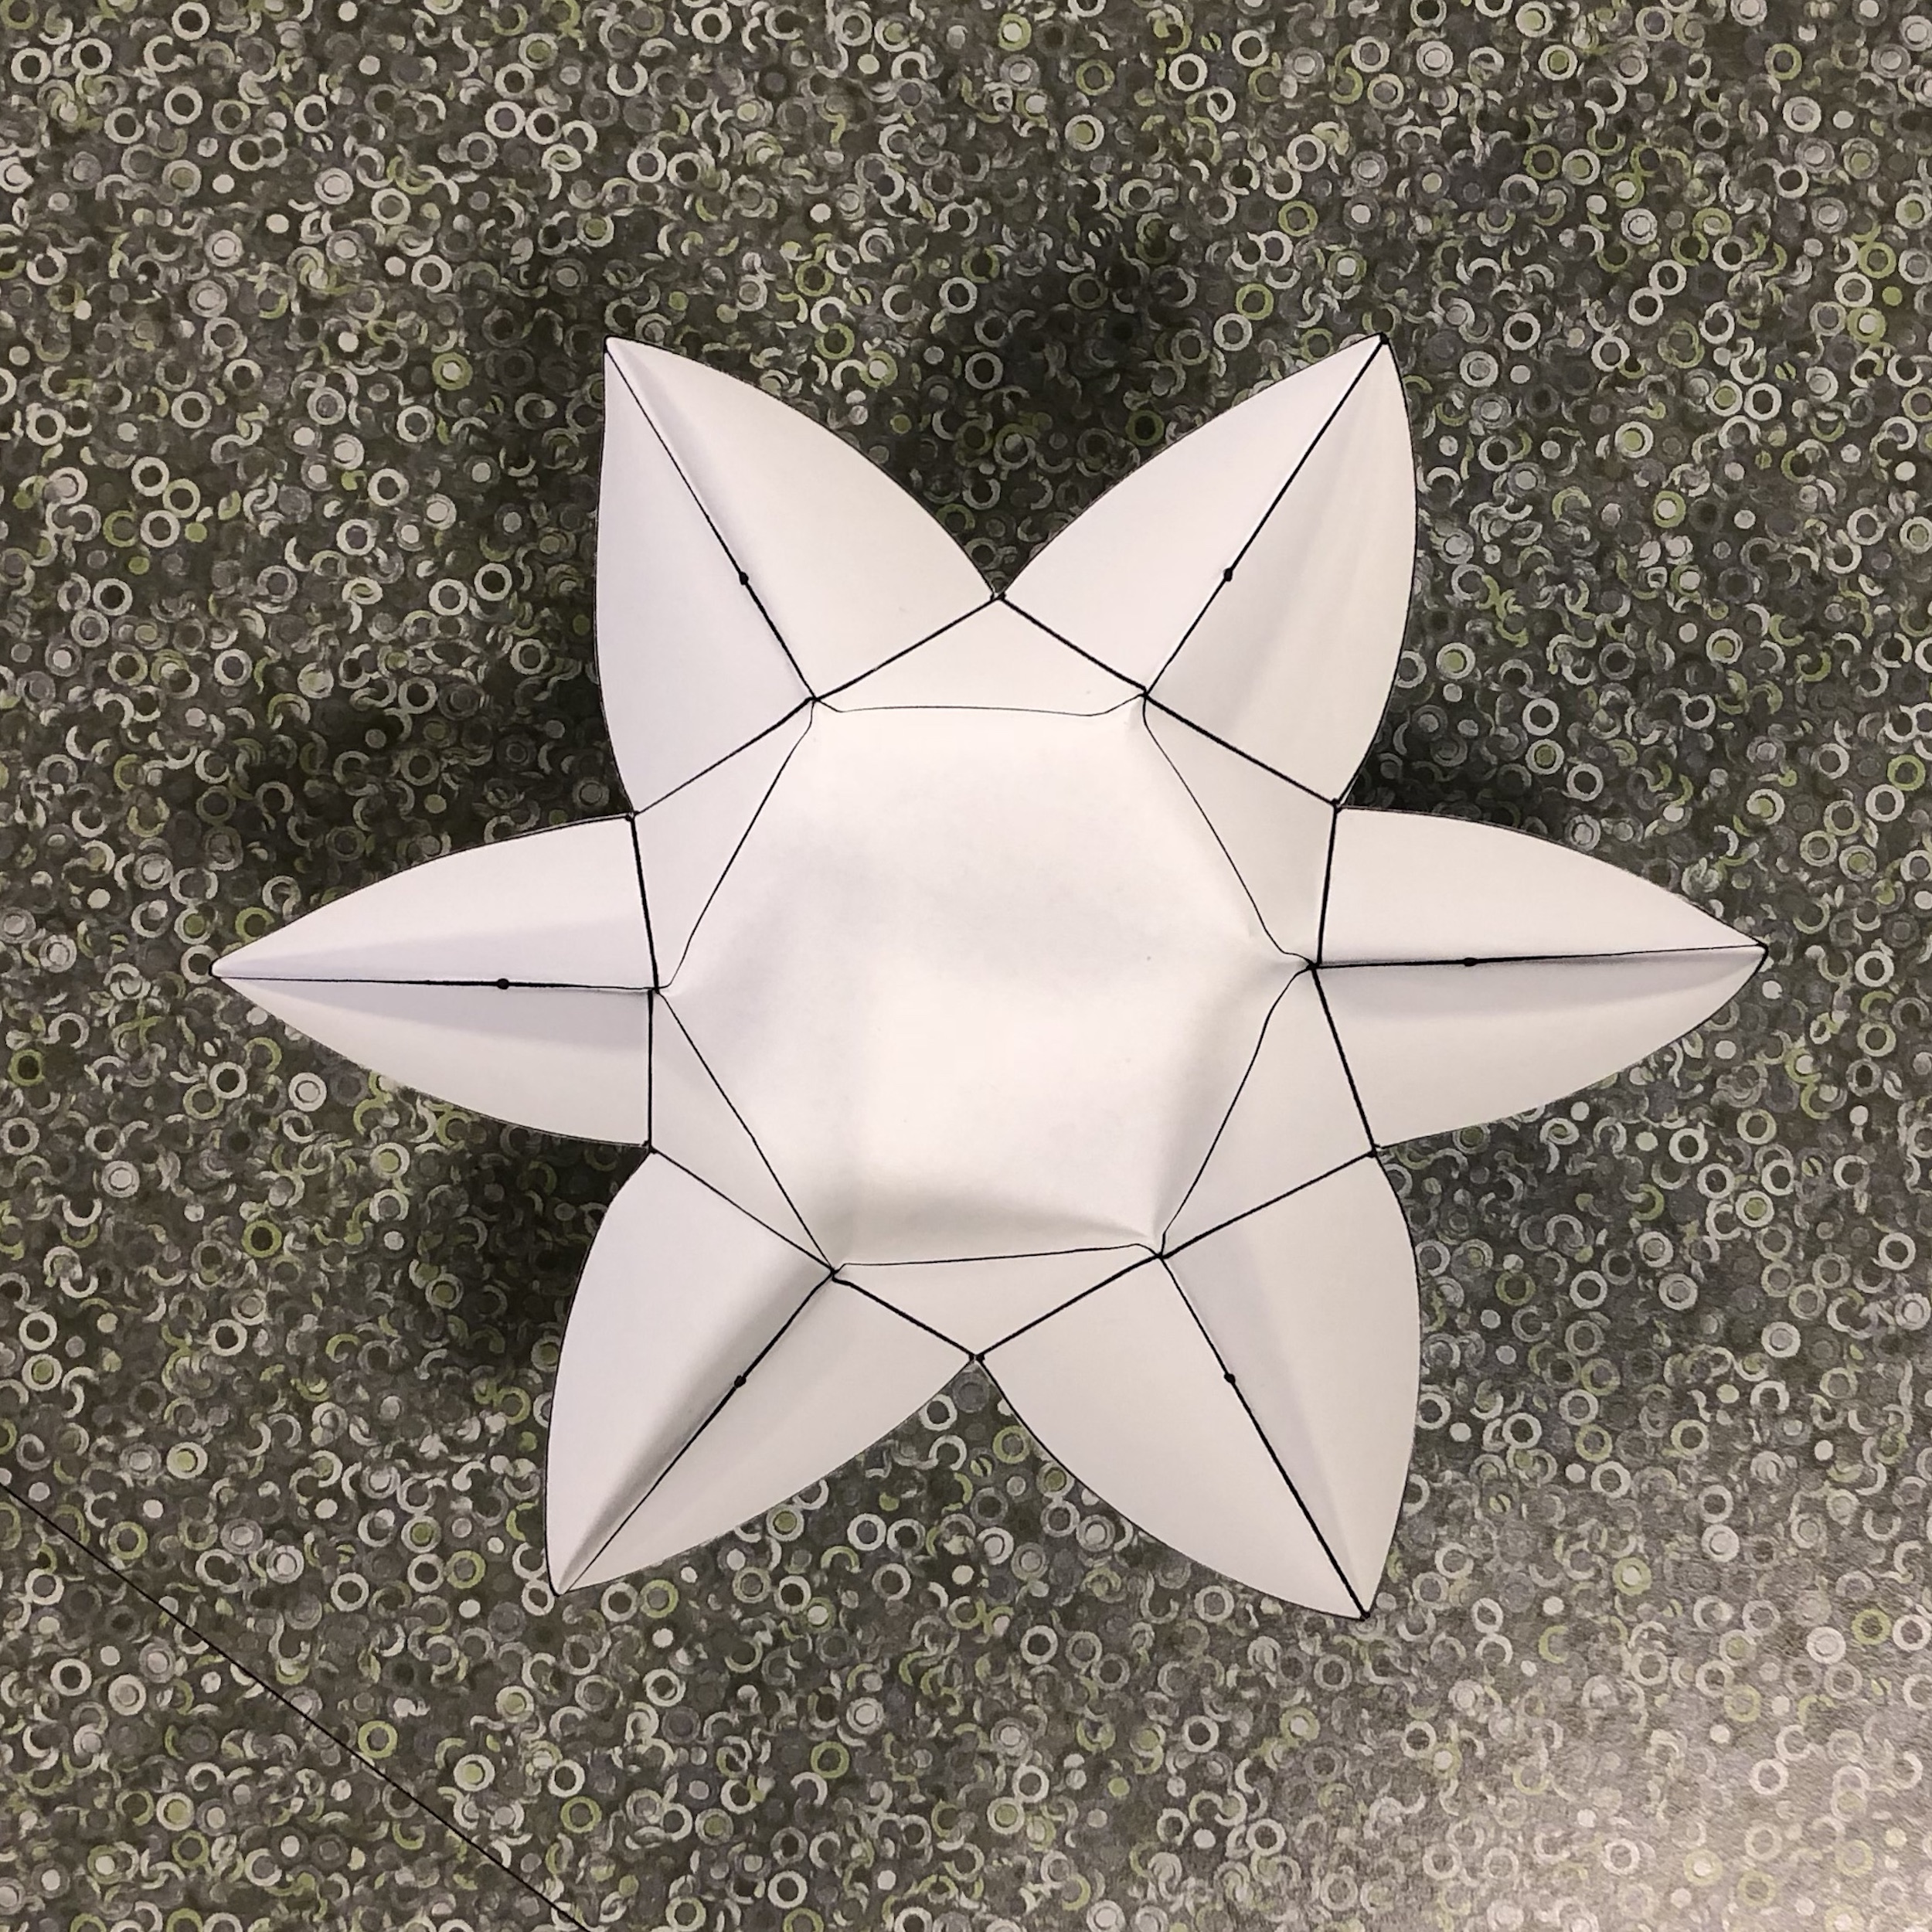
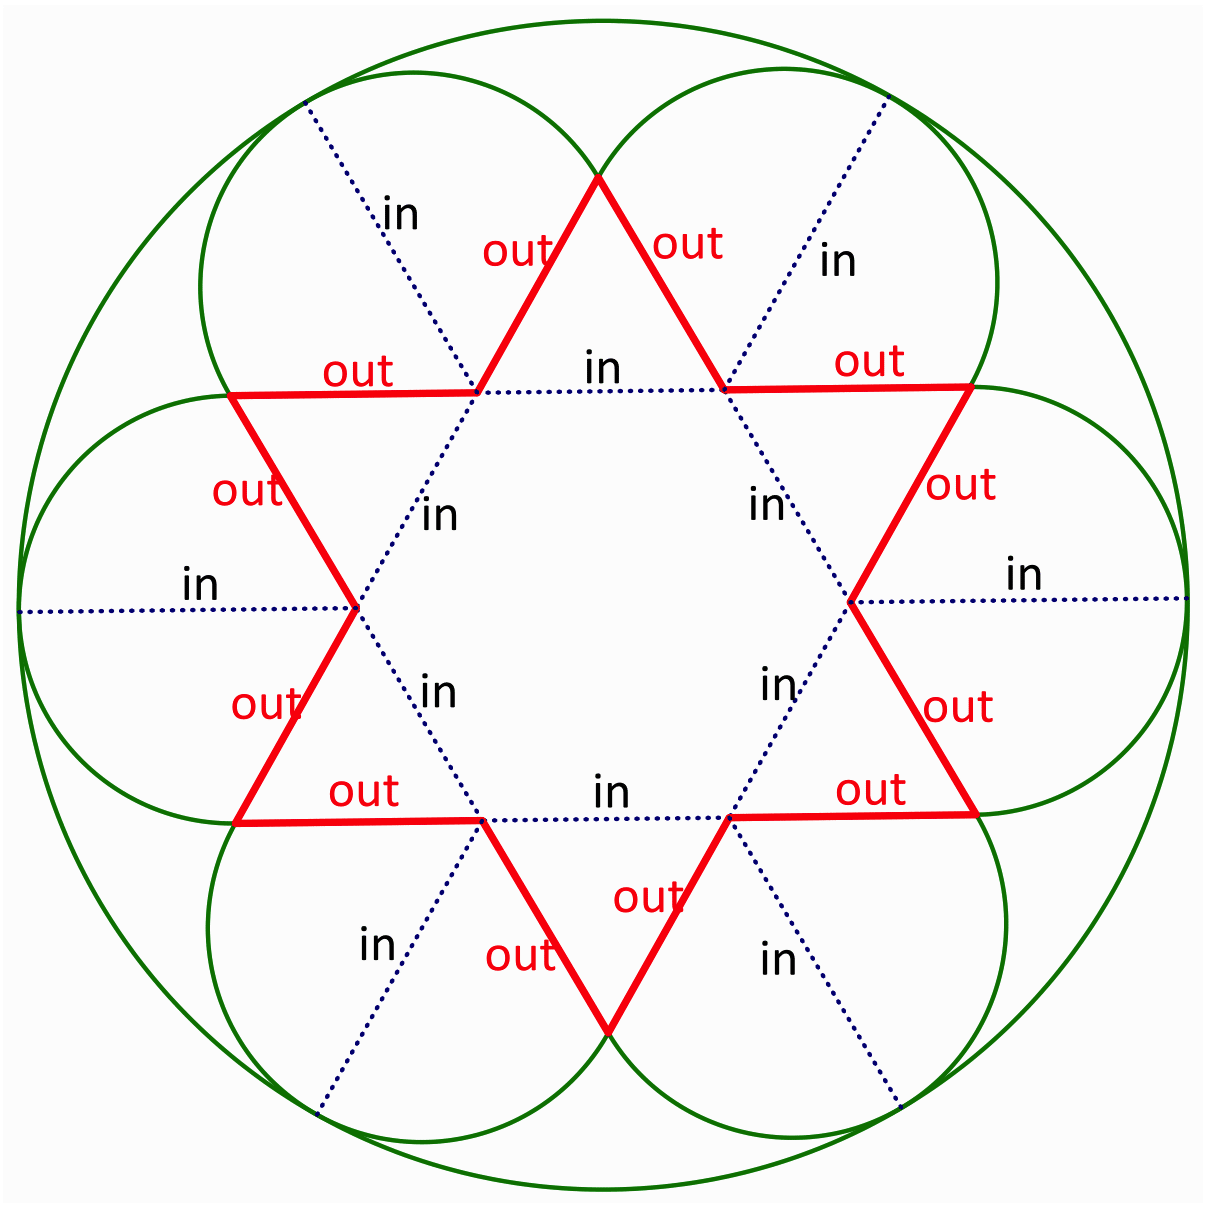
The tricky part is how to fold it.
Now, fold along each line, each time making a strong crease. The hard part is to figure out which fold goes
"in" and which goes "out". On the figure to the left, the lines folded "in" are dotted,
and the lines folded "out" are red. Can you put it together now?