Long-eared critters to design, cut, and fold
(Geometry in early grades)
Supplies: One 5” by 8” index card for each critter; scissors, ruler, compass point (for scoring), paperclip or scotch tape, pencils (for drawing critter’s features), ball of cotton and glue (optional) for tail.
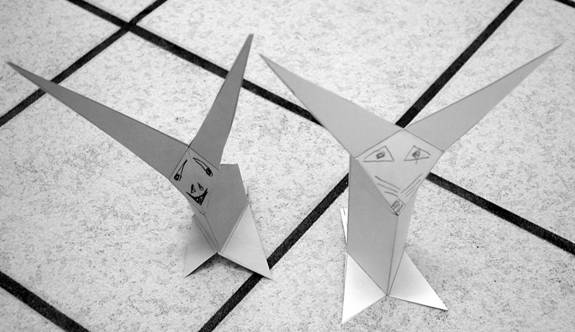
When the critter is finished, it has an open triangular prism for a "body". We found that small plastic eggs fit almost perfectly in the opening, for an added touch.
Task 1.
We will first design and make a long-eared critter without feet. Here is a pattern:
Procedure.
1. Using a ruler, draw segments AC and BD.
2. Put tick marks along the bottom of your card, at 1.25 inches, 2.5 inches, and 3.75 inches (dividing the edge into fourths). Do the same for the top edge.
3. Using the tick marks as guides, draw segments EN, FM, and GO. (The placement of point M does not have to be precise, but it should be slightly above points N and O.)
4. Draw segments AM and BM.
5. Place a point K on segment BD, about 1/2 inch below point I. On the other side, place a point L on segment AC, about 1/2 inch below point J.
6. Draw segments KM and LM.
7. Draw a face on quadrilateral HJMI.
8. Score along all dotted lines.
9. Cut along all solid lines.
10. Fold along dotted lines. Fold IM and KM in opposite directions. Fold JM in the same direction as IM, and LM in a direction opposite to JM.
11. Fasten triangles DEN and CGO together with a paperclip, making a triangular base for your critter to stand on.
12. You may add a cotton ball for a tail.
Task 2.
Our second design is a critter with feet. Here is one pattern:
1. Using a ruler, put tick marks 1 1/2 and 2 1/2 inches up the left edge of the card, at N and H. Do the same thing on the right edge, at O and I. Draw segments NO, AI and BH.
2. Put tick marks along the bottom of your card, at 1.25 inches, 2.5 inches, and 3.75 inches (at E, F, and G, dividing the edge into fourths). Do the same for the top edge.
3. Using the tick marks as guides, draw segments EJ, FK, and GL. (The placement of point K does not have to be precise, but it should be slightly below points J and L.)
4. Draw segments AK and BK.
5. Place a point R on segment BH, about 1/2 inch below point P. On the other side, place a point S on segment AK, about 1/2 inch below point Q.
6. Draw segments RK and SK.
7. Draw a face on quadrilateral KPMQ.
8. Score along all dotted lines.
9. Cut along all solid lines.
10. Fold along all dotted lines. Fold PK and RK in opposite directions. Fold QK in the same direction as PK, and SK in a direction opposite to QK.
11. Triangles F-Z-AA and F-BB-AA are the front feet. NXVUT and O-BB-WXY are the tail. Fasten them together with a paperclip.
12 may add a cotton ball for a tail.
Task 3.
Our third design is for a critter whose ears are bigger. Below is a design. Can you draw it simply by looking at it? (You may leave off the feet if you like.)