Graphic created with demo file from POV-RAY.
|
Four cubes
(A difficult design problem)
|
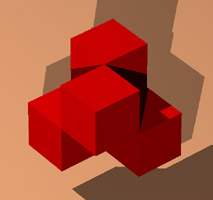 |
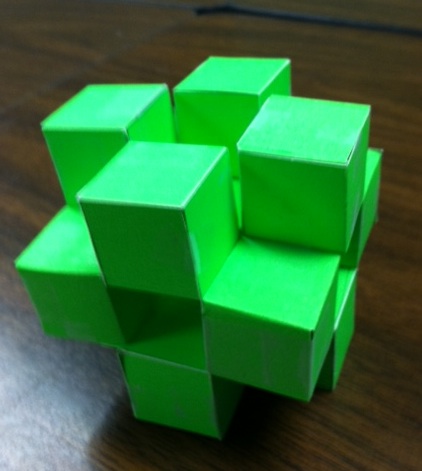
The purpose of this unit is to learn to make from cardstock or poster board
the four-cube “sculpture” shown above on the right. [Note: Children
in elementary grades can build the four cubes from a one-piece pattern.
(Six one-piece patterns are given at the end of the unit.) The cubes are
a challenge to put together when they are made from two pieces, and this
task is better suited for middle school students.]
On a chess board, each side is shared by one white and one black square.
And each vertex is shared by four squares, two white and two black. Imagine
a three dimensional board with cubes instead of squares. Now each face is
shared by one black and one white cube. Each edge is shared by four cubes,
two black and two white. And each vertex is shared by eight cubes, four
black and four white.
 Tools
and Supplies:
Tools
and Supplies:
Scissors, 4x6 or 5x8 index cards (or poster board), ruler, Scotch tape, scissors,
point of compass or other sharp object (for scoring).
Task.
From two index cards, make a model of four white (or four black) cubes sharing
one vertex. Any two of them have exactly one edge in common.
If you use a card that is 5 by 8 inches, the edge of your cubes should be 1
1/4 inches long. If you use a card that is 4 by 6 inches, the edges should be
1 inch long. Smaller cards are more difficult to handle. Fasten the cubes with
Scotch tape. Making the design is rather difficult, and making a "neat"
model also requires considerable dexterity.
Example of a solution.
(For 4 by 6 cards, the sides of the squares are 1 inch long; for 5 by 8 cards
they are 1¼ inches long.)
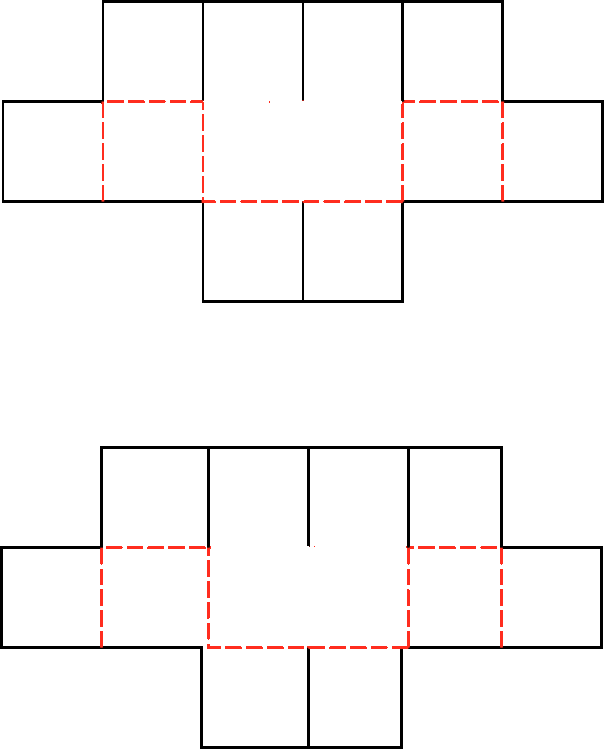
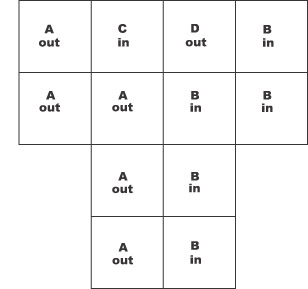
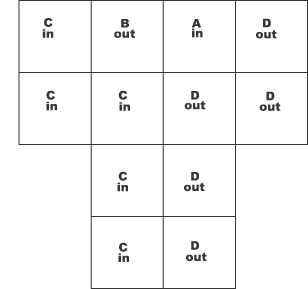
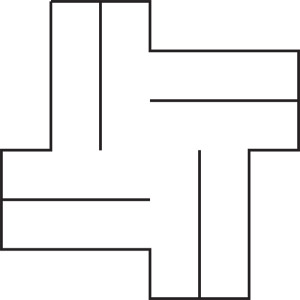
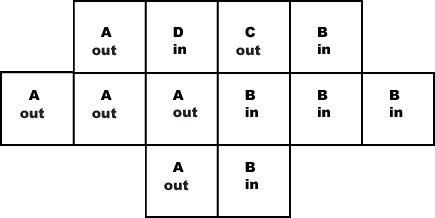
Make two congruent patterns (one from each card), as shown below. Label the
squares A, B, C, and D as shown. Squares labeled by the same letter are faces
of the same cube. “Out” means that the face should be folded so
that it is on the outside of the cube, and “in” means that the face
should be folded so that it is on the inside of the cube. Cut out the two patterns.
| Pattern 1 |
 |
| Pattern 2 |
 |
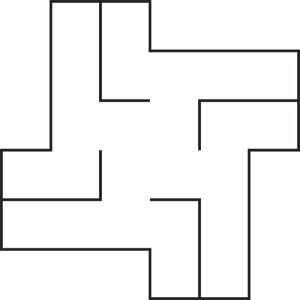
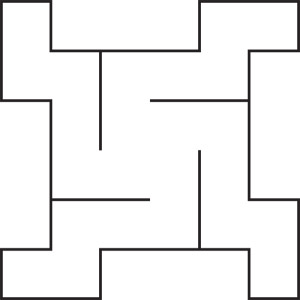
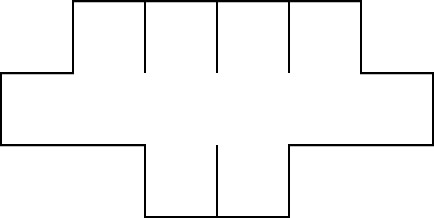
Cut each pattern along the four solid vertical lines shown:
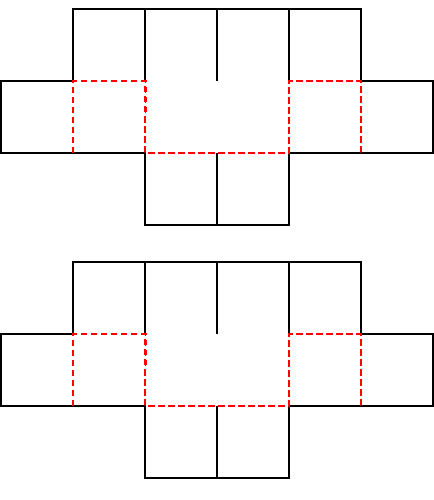
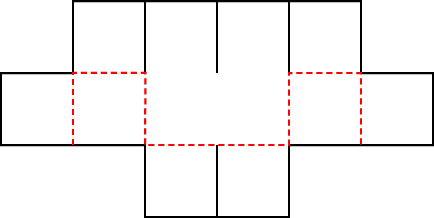
Now fold each piece along the red dotted lines indicated below. (You may score
along the lines with the point of a compass before folding. This will help make
your creases sharp.) Click on the pattern below to see it full-sized.
When you fold, remember that two cubes have only one edge in common. When the
two pieces are folded and taped, one should be the mirror image of the other.
Putting the two mirror images together to form the four cubes is difficult!
Rather than making two mirror-image pieces, you may prefer to try this way
to make the four cubes:
Fold pattern 1 into 2 cubes, A and B, each with one face missing. Faces lettered
A are on the outside, and faces lettered B are on the inside. Tape the edges.
Crease the red dotted lines of pattern 2, but keep it unfolded. Slide it into
pattern 1. Make sure that face B on pattern 2 fits on cube B of pattern 1, and
that face A on pattern 2 fits on cube A of pattern 1. Now fold together cubes
C and D. Tape the edges.
When you finish constructing the 4 cubes, they should look like this.
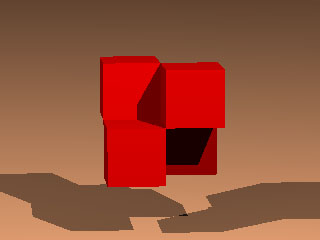 |
Click the image on the left for an animation.
(This is a large file and requires Macromedia Flash5 playback which will
automatically download and install from the macromedia site if the file
is needed.)
|
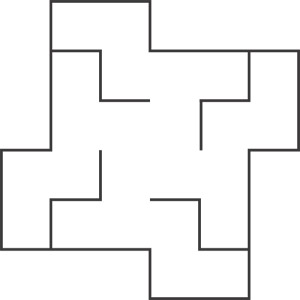
Another design.
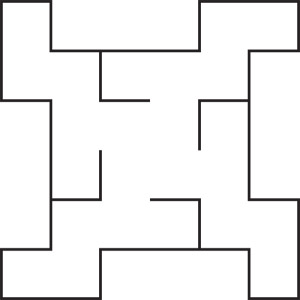
For the above patterns, cut along the solid lines, and then fold:
Students in our classes enjoy putting a double thread through a vertex of one
of the cubes and hanging it from the ceiling. They also make them in different
sizes, and one student even made a skeletal structure!
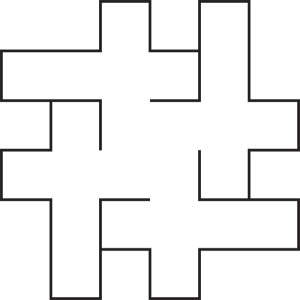
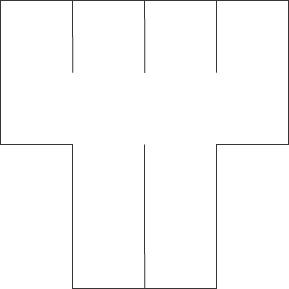
Can you make a design for four cubes that is all in one piece? Here are some
patterns. (Cut along the solid lines.) Folding a pattern is tricky, but children
in elementary grades can do it. (All faces are squares!)
(Original designs by Peggy Williams)
Here's another example of a cube sculpture made by our student
Sengdhuan Defibaugh-Chavez
Click on the image for the 2-D plan in pdf.
Webpage Maintained by Owen Ramsey
Lesson Index